Time to get those inspections booked!
With the necessary inspection types in place, you can now create a well-organized inspection schedule that meets your project's specific requirements. By adhering to the inspection schedule, you can proactively identify and address any issues or violations.
Starting the Scheduling Process:
To begin scheduling inspections, navigate to the Community Product and click on the 'Industrial pretreatment' section. From there, click on 'Inspections' and select 'Schedule Inspection' This will open a form where you can fill in the necessary details for the new inspection. We recommend you provide as much detail as possible to help Klir become your team’s single source of truth.

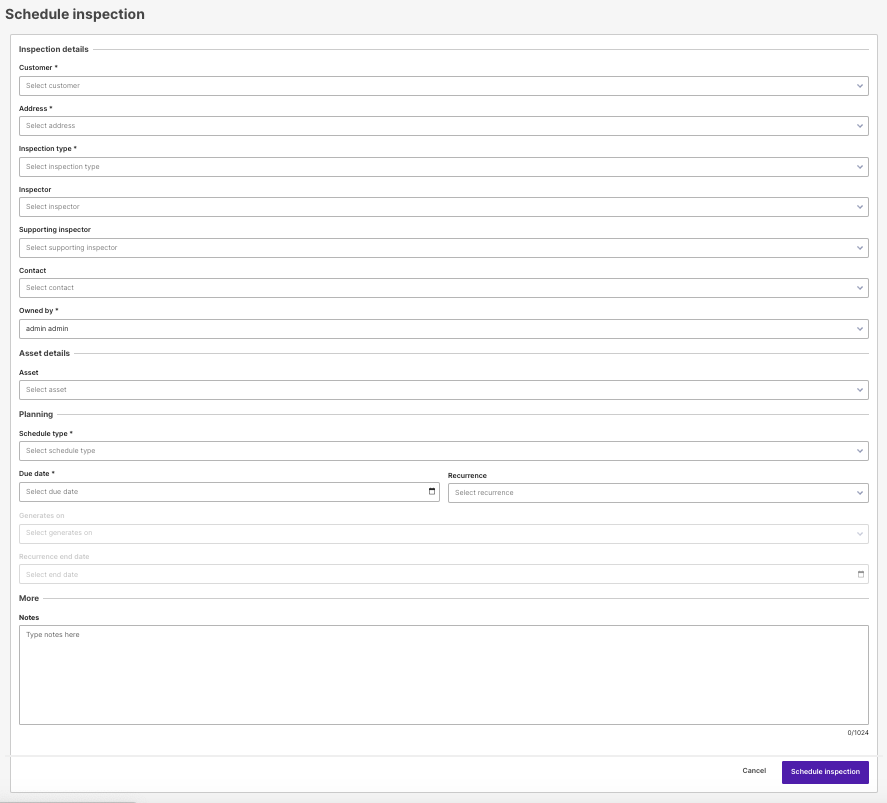
Inspection Details
Customer *: Select a customer from the picklist that contains all existing customers in the system.
Facility: Depending on the customer selected, the Facility option will only appear if the selected customer has any associated facilities.
Address: Address of the customer - this value will auto populate when a customer is selected.
Inspection type *: Choose an Inspection Type from the available options on the pick list. If you do not see a specific inspection type, new Inspection types can be created in the Admin area of the Community product.
Inspector: Choose an inspector from the provided options on the pick list.
Supporting inspector: Choose a Supporting inspector from the provided options on the pick list.
Contact: Contact Information area.
Owned by *: Name of the owner of the inspection.
Asset Details
Asset: Select an asset from the pick list.
Planning
Section to input the Schedule type and date values including recurrences.
More
Notes: Area to add notes for the Inspection if needed.
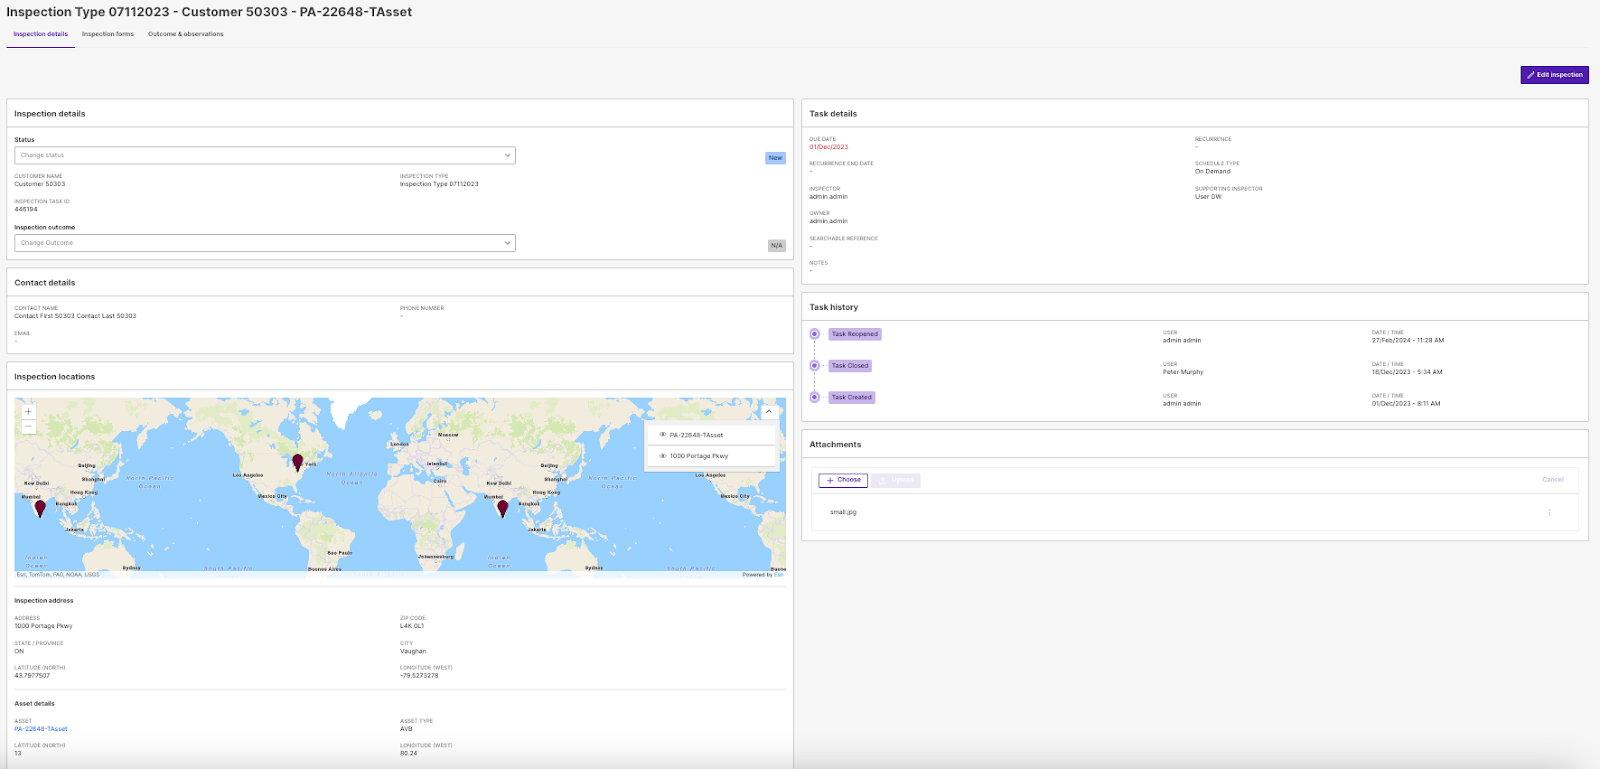
Once all the information has been reviewed for accuracy and completeness, team members can schedule the inspection by clicking on the “Schedule Inspection” button. The inspection is then added to the inspections list. Clicking on an inspection will bring up all the specific details for that inspection, and your team can also edit the inspection form from this screen if needed.
There you have it! Your team no longer has to rely on multiple tools to create one inspection schedule. You’ll also have visibility into inspections across your whole team for a holistic view.
To go to the next article in the Learning Path, Reviewing and Submitting Inspections for Compliance, please click here.