Uh-oh. Unfortunately the inspection didn’t go as you’d hoped and now there’s an issue or violation to deal with. Fear not, Klir makes it simple to track issues and take action.
This section of our learning path will guide you through issue handling, enabling you to identify, track, and resolve issues that may arise during operations. By leveraging the Issues register found in the Compliance section of the Community product, you'll have the tools to support effective issue management and ensure regulatory compliance.
Issues Register
The Issues Register is a powerful tool that serves as a central hub for monitoring and managing all recorded issues within an organization. It provides a comprehensive dashboard that offers a clear snapshot of the organization's compliance status. With the Issues Register, organizations can proactively identify, prioritize, and resolve issues, ensuring efficient and effective issue management.
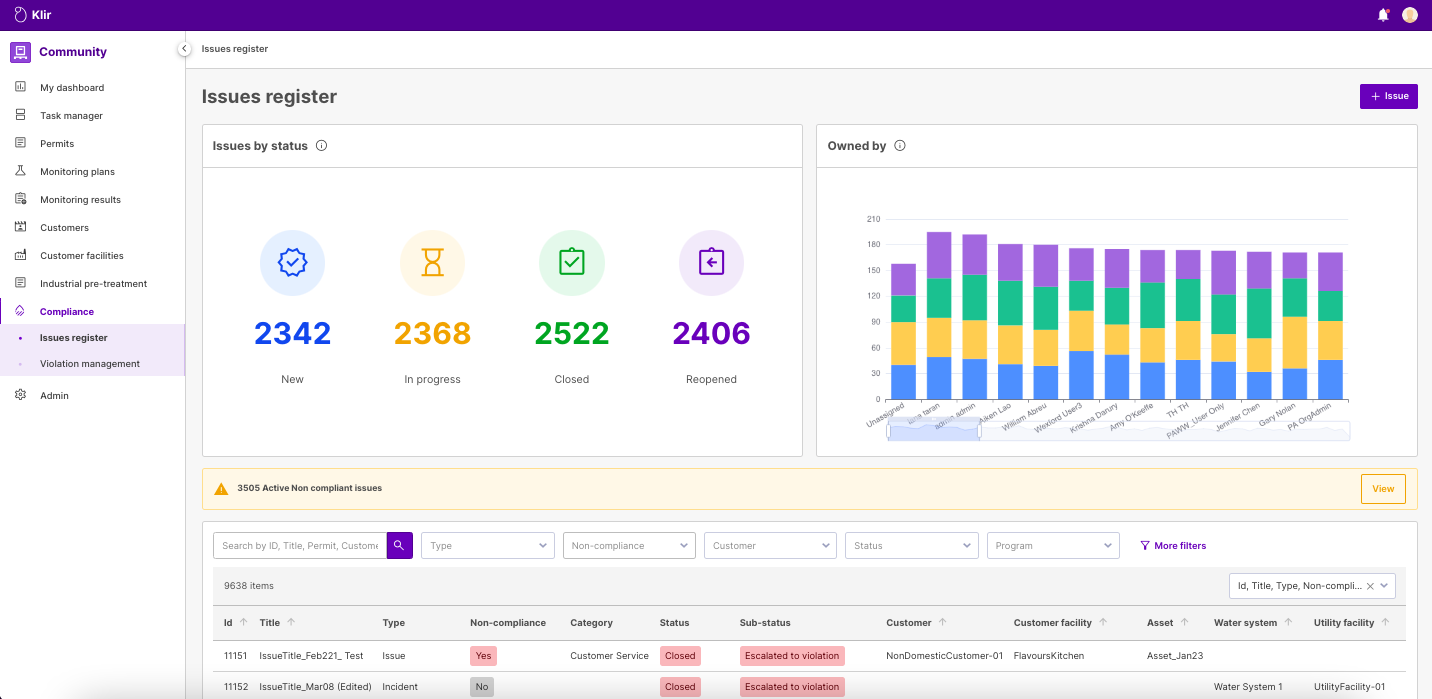
This register not only tracks issues but also gives information to help initiate corrective measures and re-evaluate previously closed issues. The data provided here can be used for reporting to regulatory bodies and internal stakeholders, ensuring transparency and accountability. You can create a new issue by clicking the ‘+ Issue’ button on the top right corner and begin filling out the details of that issue.
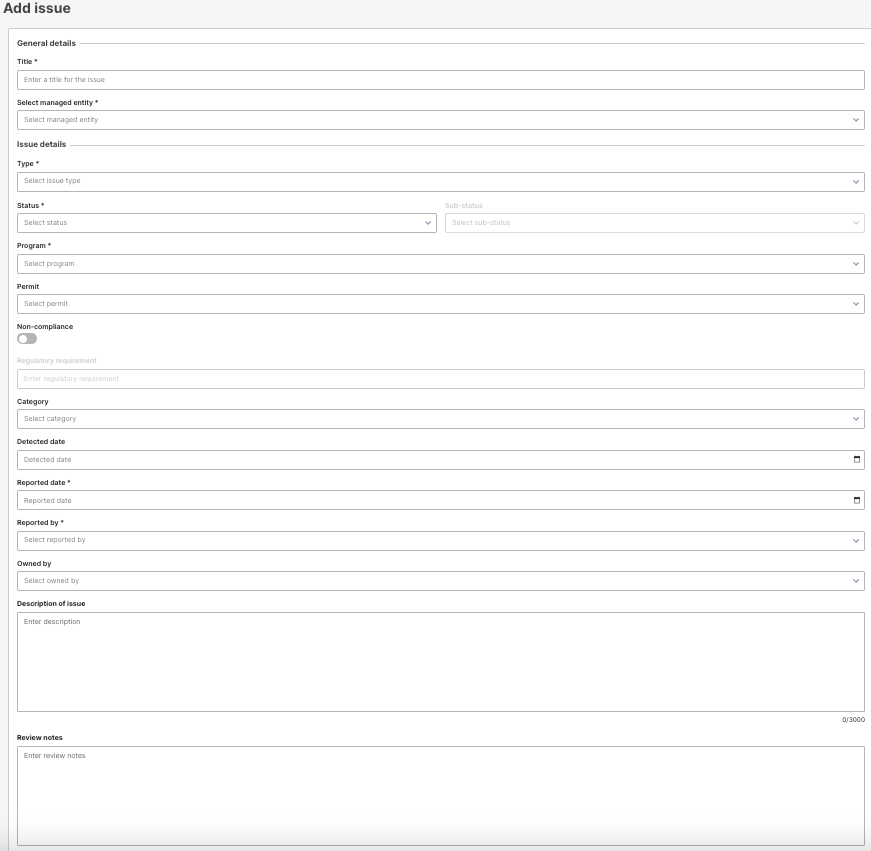
General Details
Title: Provide a title for the issue.
Select Managed Entity: Choose option of Water System / facility, Asset, or Customer / customer facility from the pick list.
Issue Details
Type: Select an Issue type from the pick list.
Status and Sub-Status: Select options from the pick lists to apply a status.
Program: Select Industrial Pretreatment, Water Protection, or Water Reclamation from the options on the pick list.
Permit: Select the associated permit if needed.
Non-Compliance: Toggle either on or off.
Regulatory Requirement: Enter a regulatory requirement if the Non-Compliance option is toggled on.
Category: Select option from the provided pick list.
Date options: Enter Detected Date and Reported Dates of the issue.
Reported by: Enter who reported the issue.
Owned by: Issue is owned by the person entered into this field.
Description of the Issue: Area to add a detailed description.
Review Notes: Additional notes area if needed.
Clicking on the ‘Add Issue’ button will add the issue to the issues list.
Issue Details
Clicking on a specific issue will enter that issue's details page. The issue can be edited if needed after it has been created by clicking the ‘Edit details’ button.
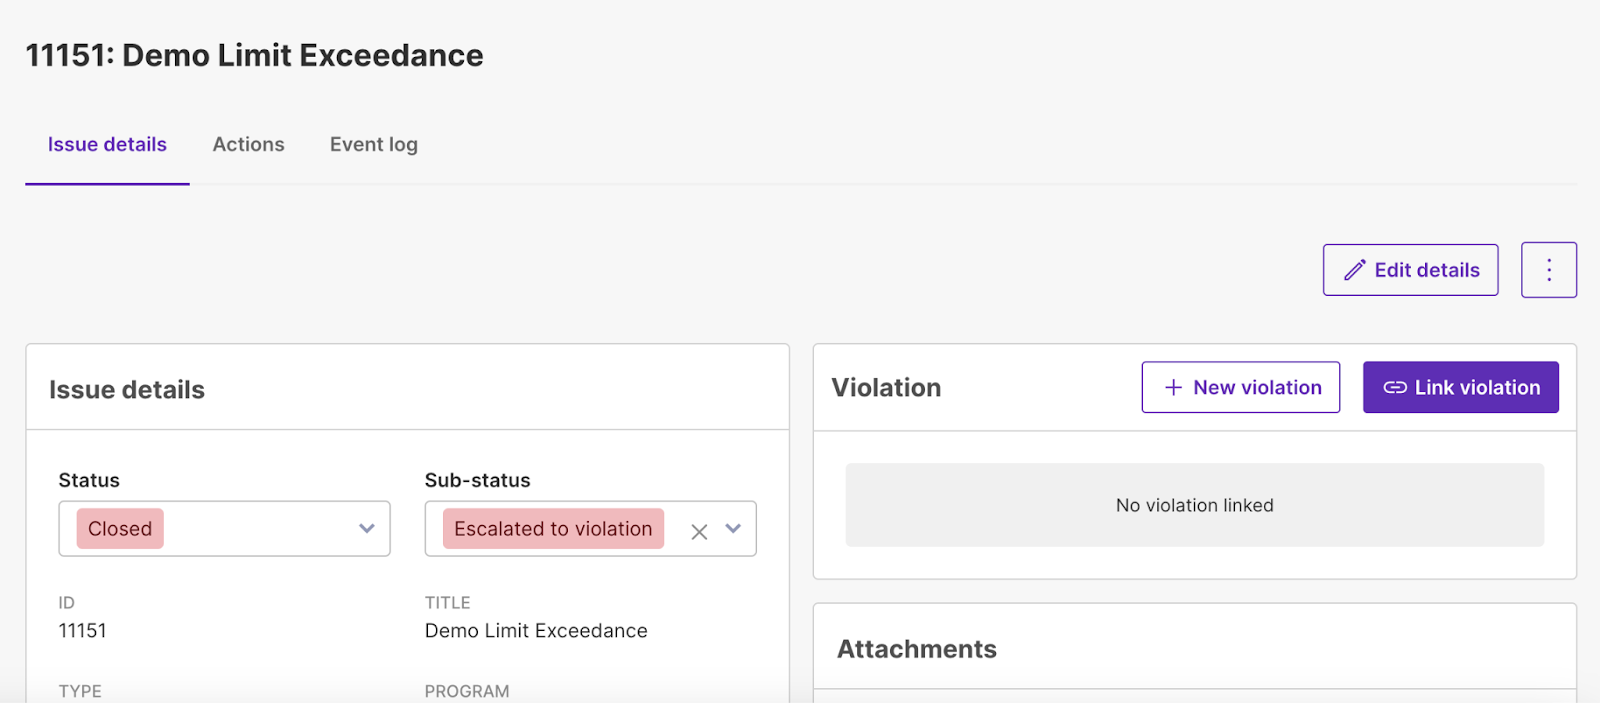
Adding or linking violations to an issue is a breeze with the ‘+ New violation’ or ‘Link violation’ buttons. Simply click on either button to get started. With the ‘+ New violation’ button, you can create a new violation and associate it with the issue at hand. On the other hand, the ‘Link violation’ button allows you to link an existing violation to the issue. This way, you can easily keep track of all the violations associated with a particular issue and ensure that they are properly addressed.
Adding a Violation
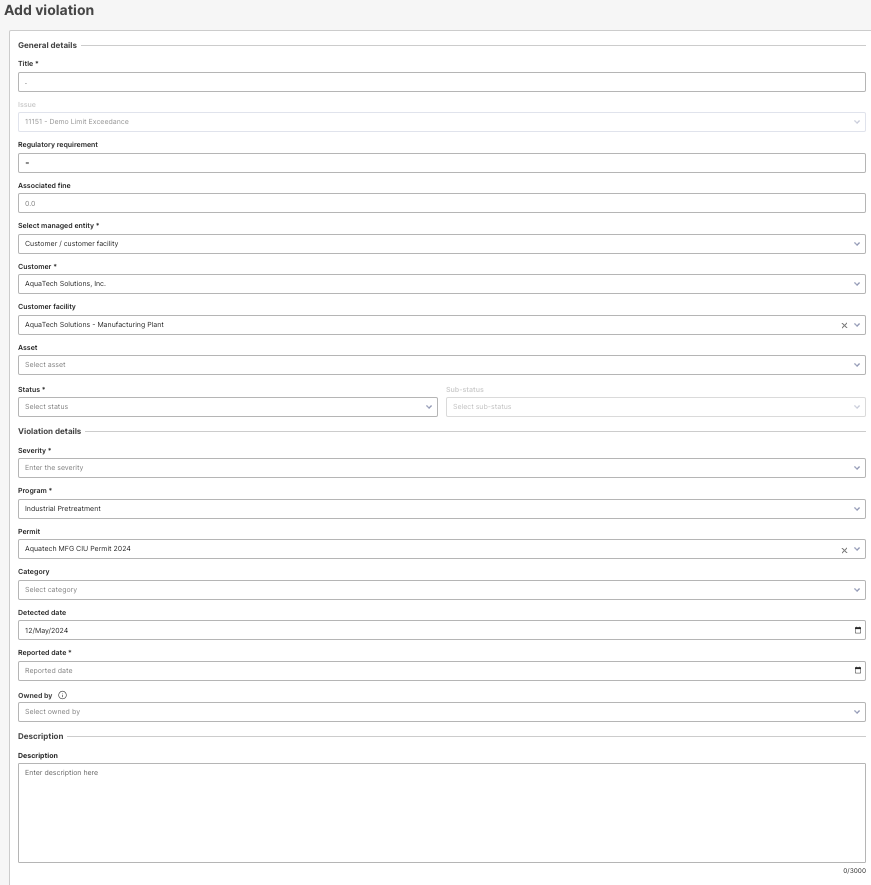
To add a violation, simply fill out the details in the Add violation form and click the ‘Add violation’ button. Once added, you can review and manage the violation in the Violation management area under the Compliance section of the Community product. More details on the Violation management area will be provided in the next Learning Path article.
Associating Violations with Issues
Identifying violations and linking them to relevant issues in your system ensures centralized documentation and management of all related actions. This streamlined approach not only enhances efficiency but also provides a comprehensive view of the situation, enabling you to make informed decisions and take appropriate measures to address the violations effectively.
Linking a Violation to an Issue:
Locate and click on a specific Issue.
- Click on the 'Link violation' button.
- In the modal that appears, select the relevant violation from the dropdown menu. These violations are typically ones that have been identified and documented but not yet associated with an issue.
- Click 'Next' to proceed.
- You will then be shown a disclaimer that all actions and event logs for this issue will be carried over to this violation.
- You are then prompted to decide if linking the violation should also change the status of the issue.
- Clicking on the ‘Link violation’ button will then link the violation to the selected issue.
Actions tab
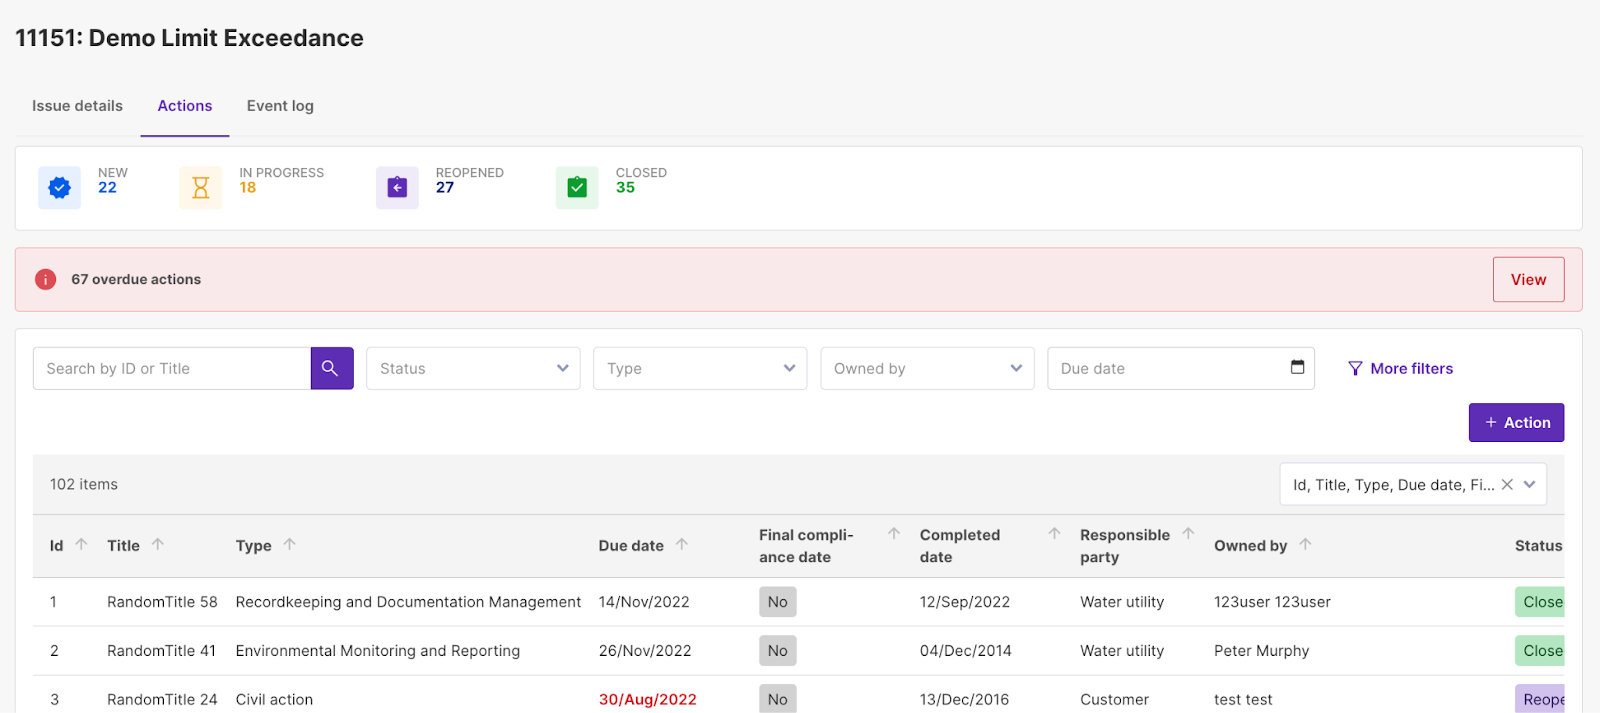
Actions are specific tasks or steps created to address or resolve issues documented in the system. Adding actions helps in tracking progress towards compliance and ensuring that all necessary steps are taken promptly. The ‘Actions’ tab displays the number of new, in-progress, reopened, and closed actions with the top tiles. Below the tiles, you can see a detailed list of actions.
To create a new action, simply click on the ‘+ Action’ button. A form will appear where you can enter all the necessary details about the action.
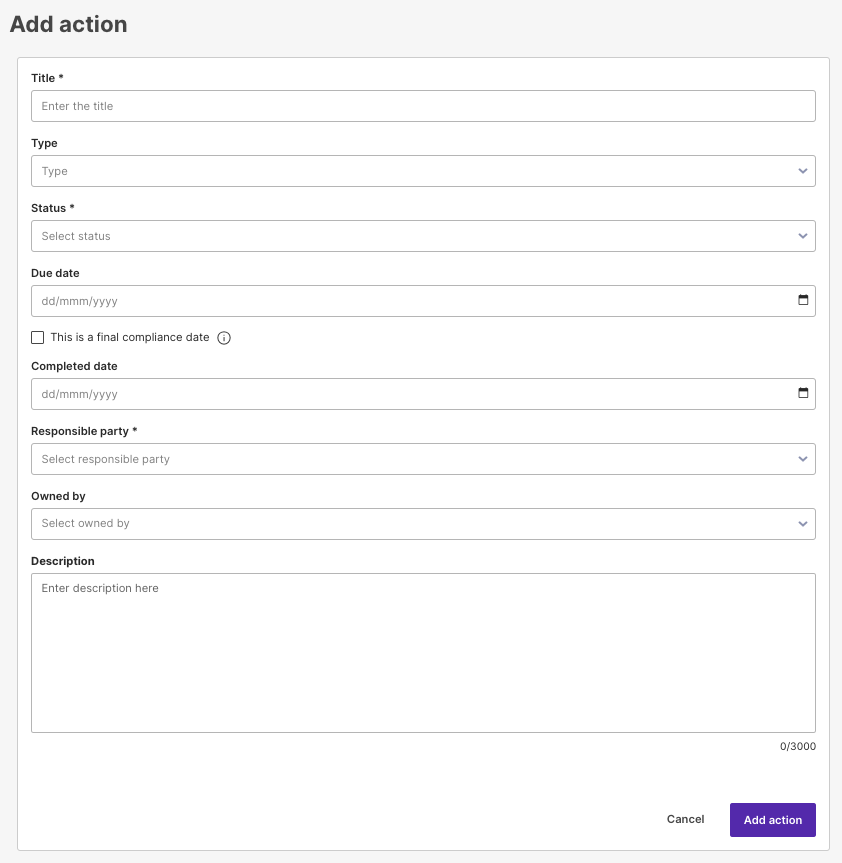
Title: Provide a title for the action.
Type: Select the type of action from a predefined list, which helps categorize the action for reporting and tracking.
Status: Set the current status of the action - New, In Progress, Closed, or ReopenedOpen
Due Date: Specify when the action should be completed.
Final Compliance Date: If applicable, mark the due date as a final compliance date.
Completed Date: Record the date when the action was completed.
Responsible Party: Select from Water Utility, Customer, Regulatory body.
Owned By: Designate who within the organization owns this issue.
Description: Add a detailed description of what the action involves.
The action will be created after clicking the ‘Add Action’ button.
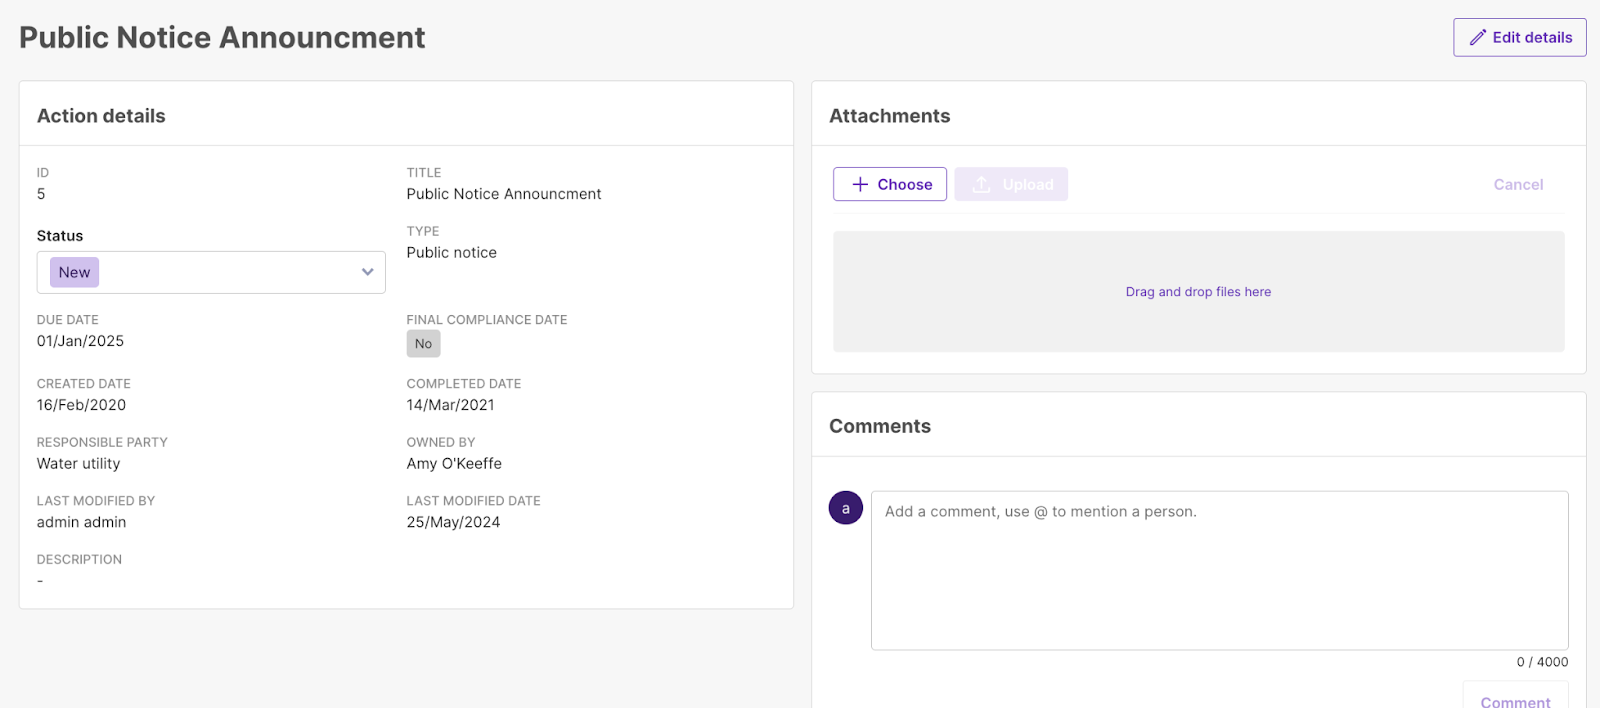
Clicking on a specific action will bring up its details, where you can review and edit them as needed. This allows you to make any necessary changes or updates to the action.
Auto-Generated Issues in Klir
The Klir platform helps streamline compliance and regulatory workflows by automatically generating issues in response to certain key events. These auto-generated issues ensure timely tracking and resolution of critical compliance tasks.
Below are the current events that trigger auto-generated issues within the platform:
🔍 Inspection Observations
Event: A Non-Compliant Observation is added during an inspection.
Auto-Generated Issue:
Type: Inspection Observation
An issue is automatically created to document and track the non-compliance for follow-up and resolution.
🕒 Overdue Pump-Outs
Event: A Pump-out becomes overdue based on scheduled or required timelines.
Auto-Generated Issue:
Type: Overdue Pump-out
This ensures that overdue maintenance activities are flagged and managed without delay.
📈 Limit Exceedances
When a limit is exceeded (e.g., discharge, quality, or regulatory threshold), Klir can generate one of the following issue types based on the severity:
- Significant Non-Compliance
- Triggered when an exceedance is deemed critical based on configured rules or regulatory definitions.
-
- Indicates a serious breach that may require immediate corrective action and reporting.
- Indicates a serious breach that may require immediate corrective action and reporting.
- Limit Exceedance
- Used for standard threshold breaches that may not rise to the level of significant non-compliance.
-
- Helps ensure ongoing monitoring and compliance follow-up.
- Helps ensure ongoing monitoring and compliance follow-up.
✅ Summary
|
Event Type |
Auto-Generated Issue Type |
|
Non-compliant inspection finding |
Inspection Observation |
|
Overdue Pump-out |
Overdue Pump-out |
|
Critical limit exceedance |
Significant Non-Compliance |
|
Standard limit exceedance |
Limit Exceedance |
By automating issue creation, Klir ensures nothing falls through the cracks—helping your team stay compliant, proactive, and audit-ready.
To go to the next article in the Learning Path, Violation Management, please click here.