Congrats! You now have all the relevant data to create a Monitoring Plan. Implementing a monitoring plan in Klir helps you move from scattered sources of information to a single source of truth, seamlessly guiding your compliance efforts.
To access the monitoring plans for a specific discharge permit, simply navigate to the Discharge Permit Page and select the desired permit. Once the permit is open, click on the 'Monitoring Plans' tab to view all associated monitoring plans. From there, you can easily manage and update the monitoring plans as needed.

To create a new monitoring plan, click the ‘+ Monitoring Plan’ button. This will open a form where you can enter all the necessary details for your plan. Be sure to include information such as the name of the plan, the monitoring period, and the parameters you want to monitor. You can also attach any relevant documents or files to the plan. Once you’ve entered all the required information, click the ‘Create’ button to create your new monitoring plan.
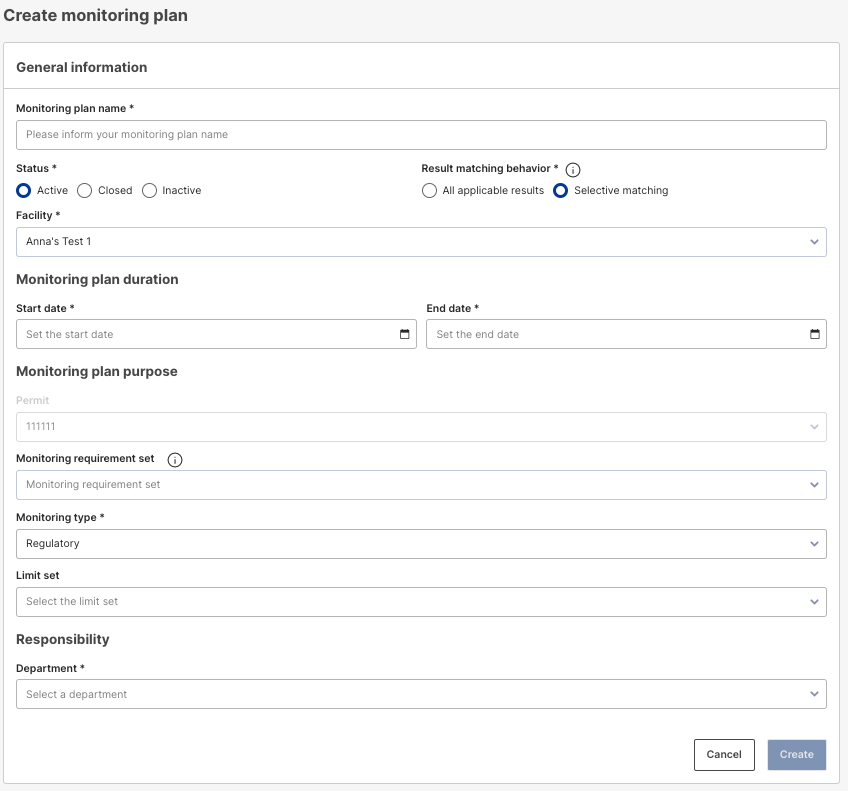
Monitoring plan name * : Input a descriptive name for your monitoring plan.
Status *: Select the appropriate status for the plan (Active, Closed, Inactive).
Result matching behavior *: Choice of All Applicable results or Selective Matching
When “All Applicable results” is selected, any sample results with the appropriate attributes will be recognized by the plan. Selective Monitoring Plans requires an explicit match by Work Order ID to recognize a sample result.
Facility *: Facility the Monitoring plan is assigned to.
Monitoring Plan Duration: Set the start and end dates to define the operational period of the plan.
Monitoring Plan Purpose: Select the type of monitoring plan and link it to a specific limit set.
Responsibility: Assign the department responsible for the monitoring plan.
|
⚠️ Note for Users Adding new monitoring requirements to an existing monitoring plan is a simple task. Navigate to the Monitoring requirements tab within the monitoring plan, and you'll be able to add new requirements as needed. This flexibility allows you to adapt your monitoring plan to any changing circumstances. |
With your monitoring plan created, you can now view a well-organized summary that presents the plan's details. This overview serves as a comprehensive guide, providing you with crucial information such as the designated start and end dates, the associated permit, the department responsible for its execution, and a clear outline of the monitoring requirements.
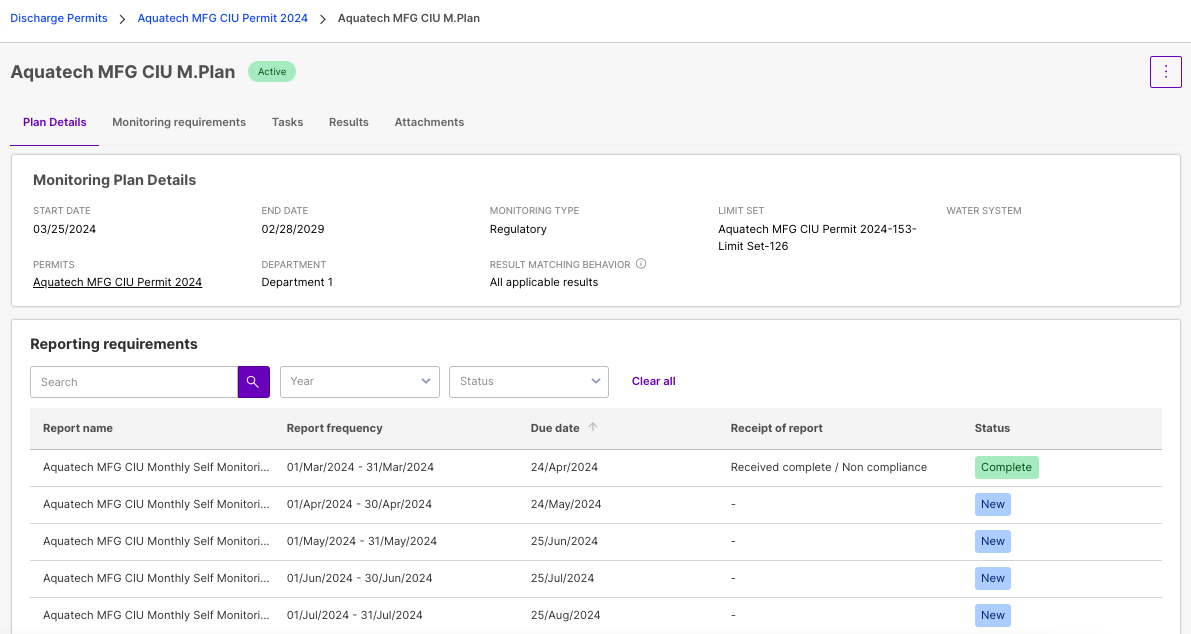
The Discharge Permit Monitoring Plan contains other tabs that you may find useful. These tabs provide additional information and functionality. By exploring these tabs, you can gain a more comprehensive understanding of the monitoring requirements and effectively manage your compliance efforts.
Monitoring Requirements Tab
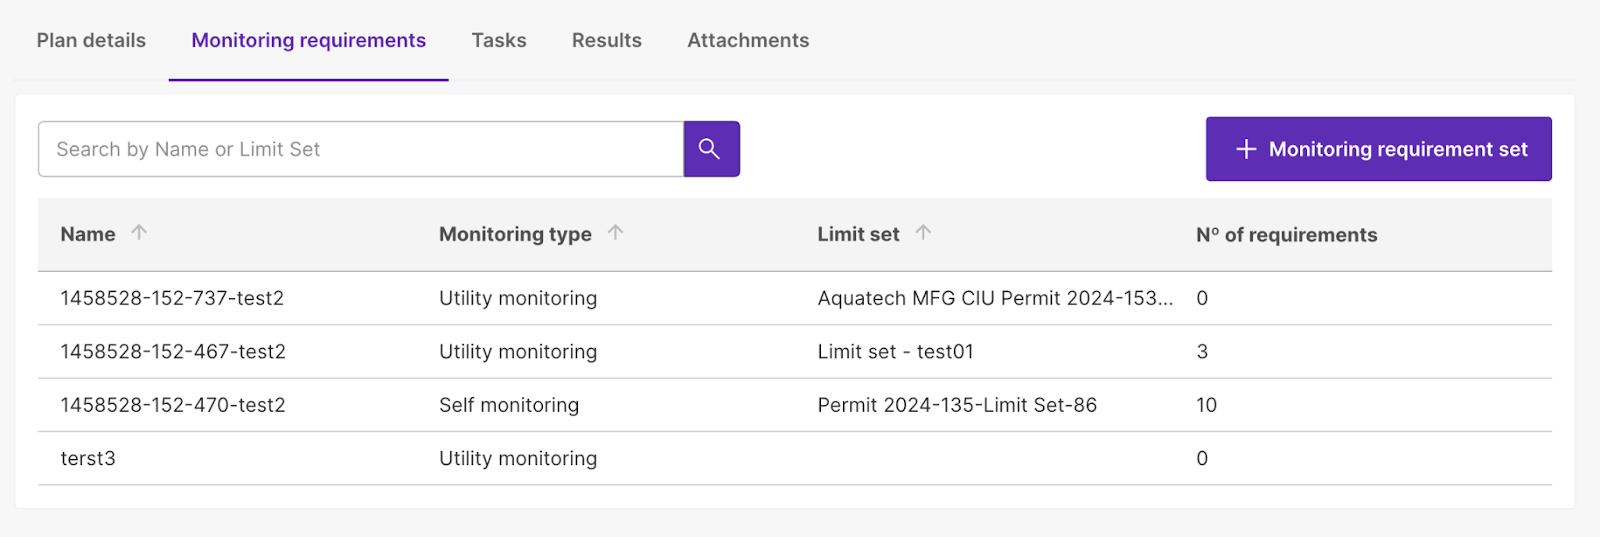
In the Discharge Permit Monitoring Plan, you can review any requirements previously applied to the plan or add new requirement sets by clicking the ‘+ Monitoring requirement set’ button. This allows you to customize and tailor the monitoring plan to meet your specific needs.
Tasks Tab
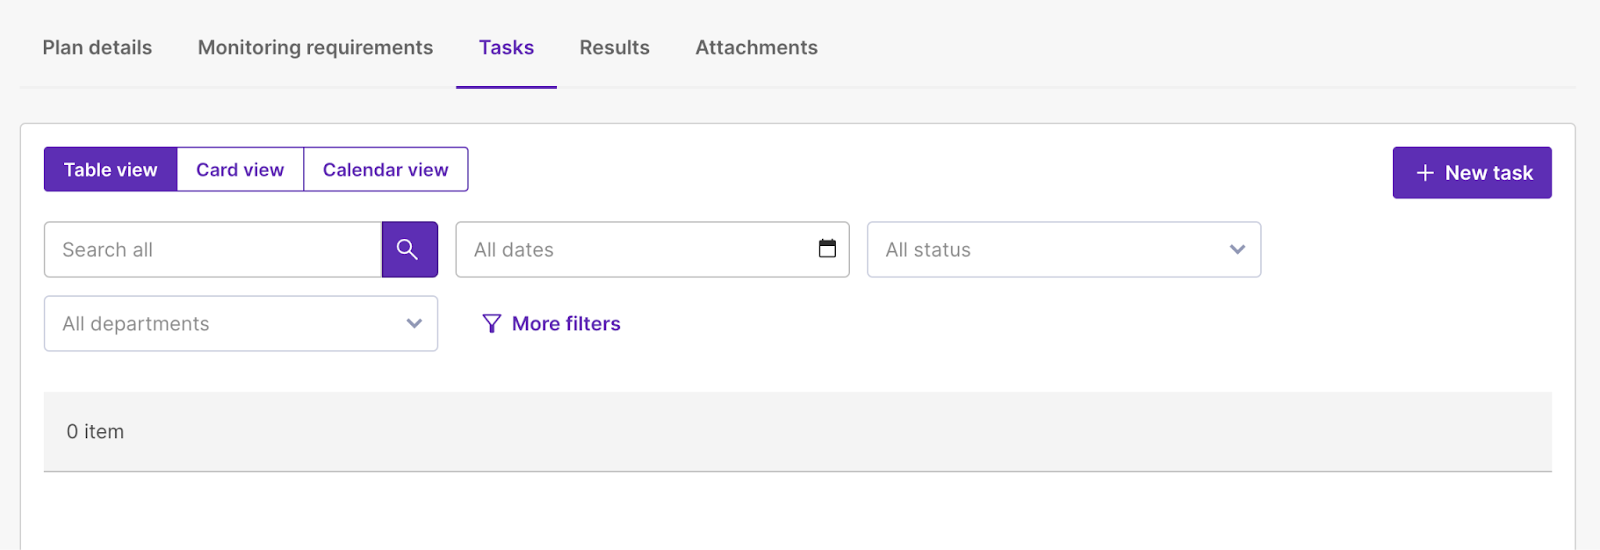
With the ‘+ New task’ button on the Monitoring Plan tab, you can create new Sample tasks using a simple 6-step process.
Results tab
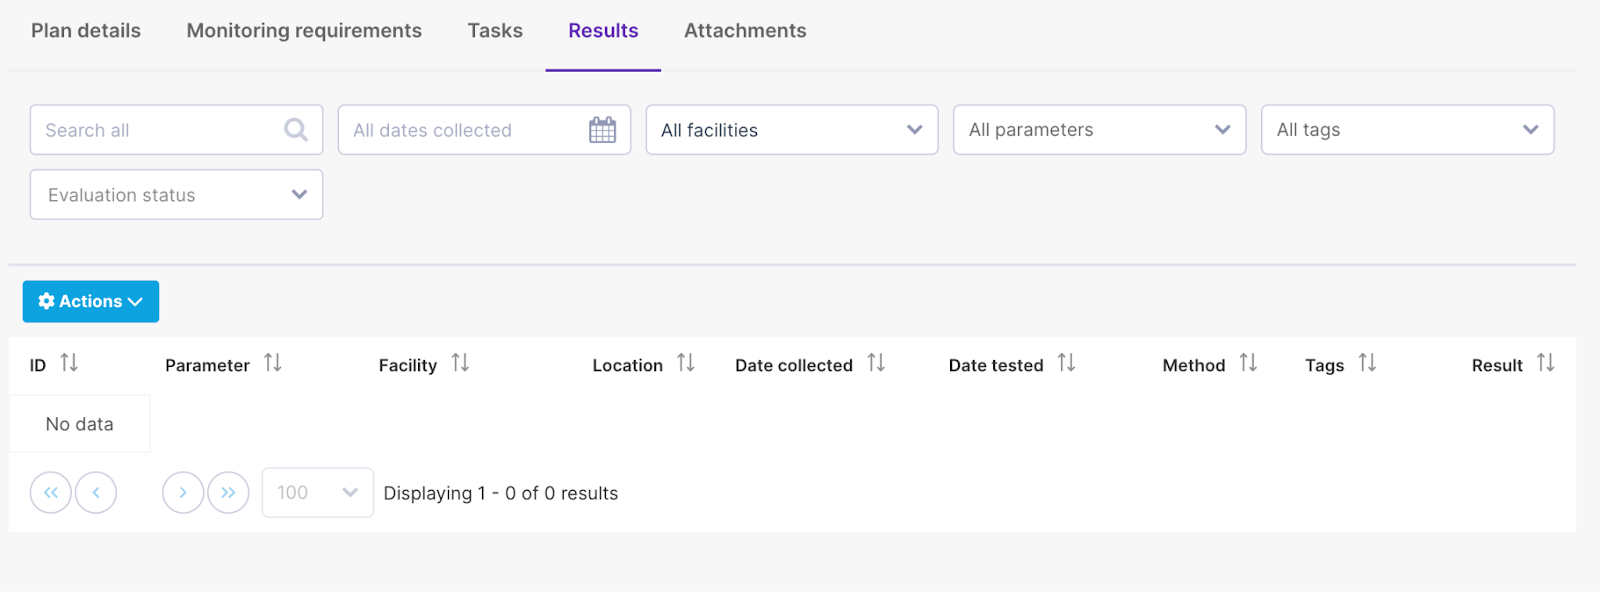
The Results tab will show all of the Sample results applicable to the Monitoring Plan.
Attachments Tab
The Attachments tab allows you to upload any relevant documents or files related to your Monitoring Plan. This could include permits, licenses, or other supporting documentation. Uploading these attachments provides additional context and information to those reviewing the Monitoring Plan.
We encourage you to include as much information as you can in your monitoring plan and associated tabs. This way when Gary goes on vacation or Sharon wins the lottery, your Klir monitoring plan is that single source of truth and no balls get dropped!
To go to the next article in the Learning Path, Discharge Permit Reporting Requirements please click here.