Creating customers in the Community product is the start of our Learning Path.
Customers are the foundation of any water utility, as they are the ones who receive and utilize the essential services they provide. At Klir, we want you to have the time for your high-value work of fostering strong relationships with customers and understanding their needs while ensuring that you are meeting the demands of the community and providing the best possible service. In order to help you achieve this, we centralize as much data as possible, so you have a full picture of each customer in one spot.
In Klir Community, a customer is defined as: An individual, business, or entity that receives and utilizes water services provided by a water utility, typically through a billing and payment relationship. Your program may include Residential, Commercial and Industrial customer types.

Creating a new customer in Klir is a breeze!
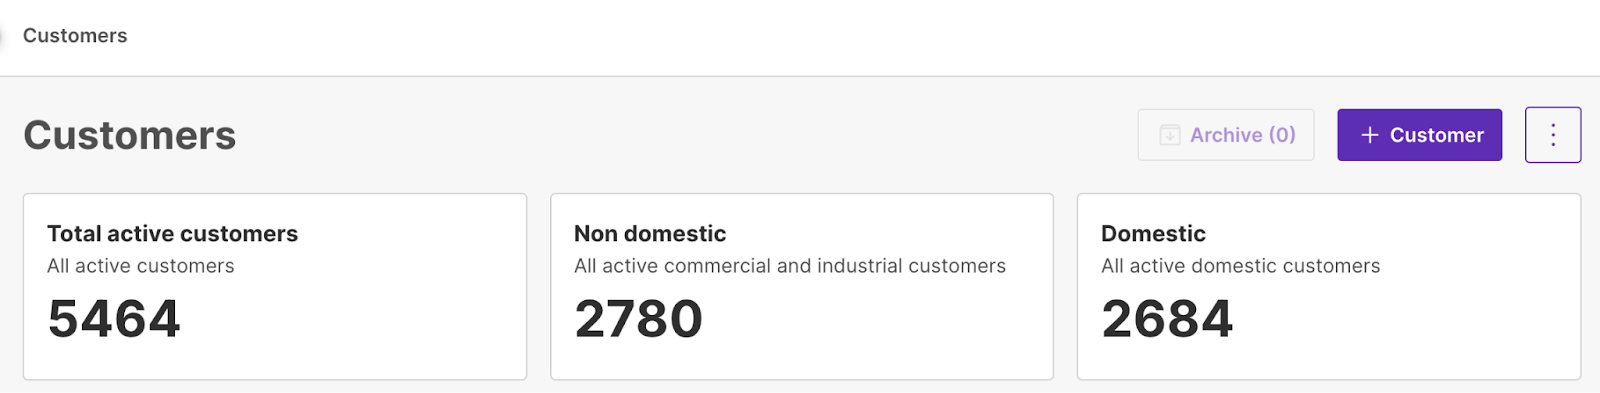
Simply navigate to the Customers section, and click on the "+ Customer" button at the top right corner. This initiates the customer creation process, where you enter all the necessary details, such as name, contact information, and billing address. Once you've filled in all the required fields, just hit the "Save" button, and voila! Your new customer is added.

You will then need to select which type of Customer you would like to create. The process is the same for both Non Domestic and or Domestic Customers:

Once you have made your selection, click 'Next' to begin the simple three-step process of creating a Customer. Klir makes it easy to manage your customers and their information, ensuring a smooth and efficient workflow.
Step 1/3: General Information
- Mandatory fields are marked with an asterisk (*).
- Optional fields without an asterisk can be filled in if you have the applicable information.
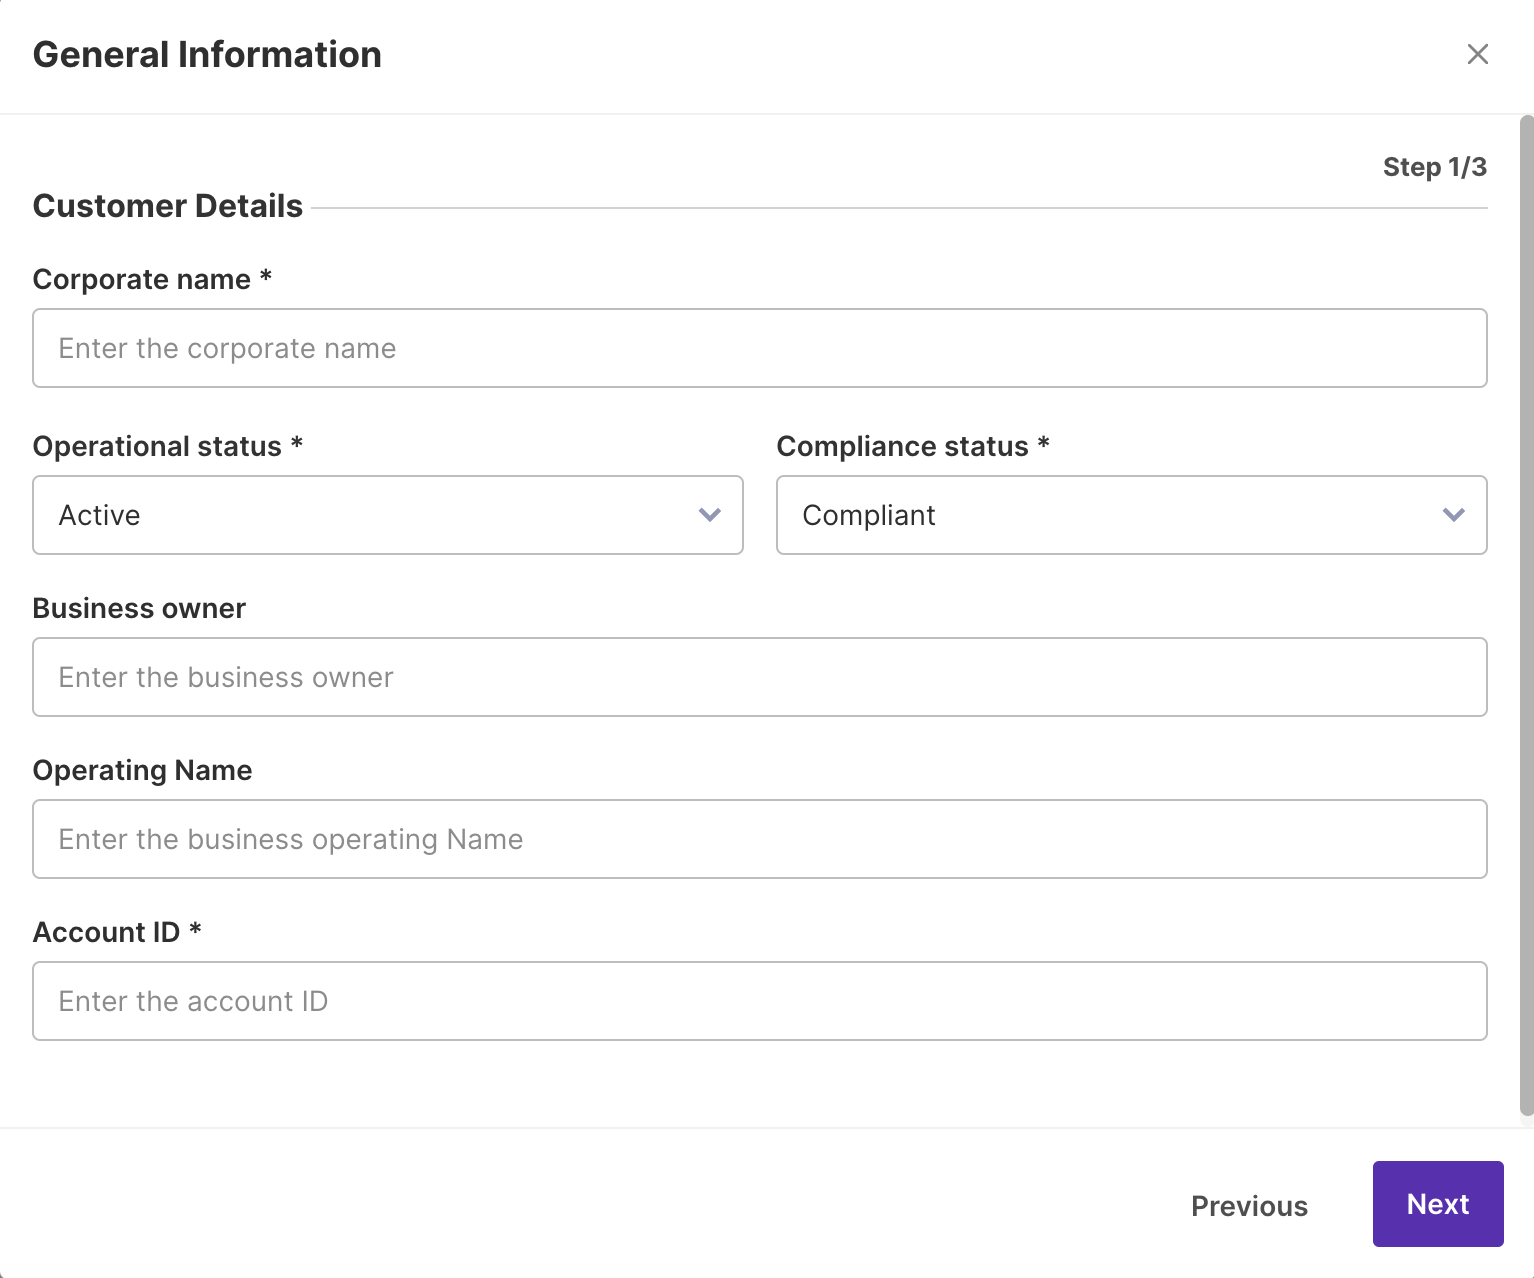
Clicking Next on the step one screen will take you to the next step.
Step 2/3: Primary Contact and Address
In this section, provide the primary contact's details, including their full name, role, email address, and phone numbers. Enter the primary address and, if necessary, a separate billing address by scrolling down the page. Make sure the information you provide is accurate and up-to-date.
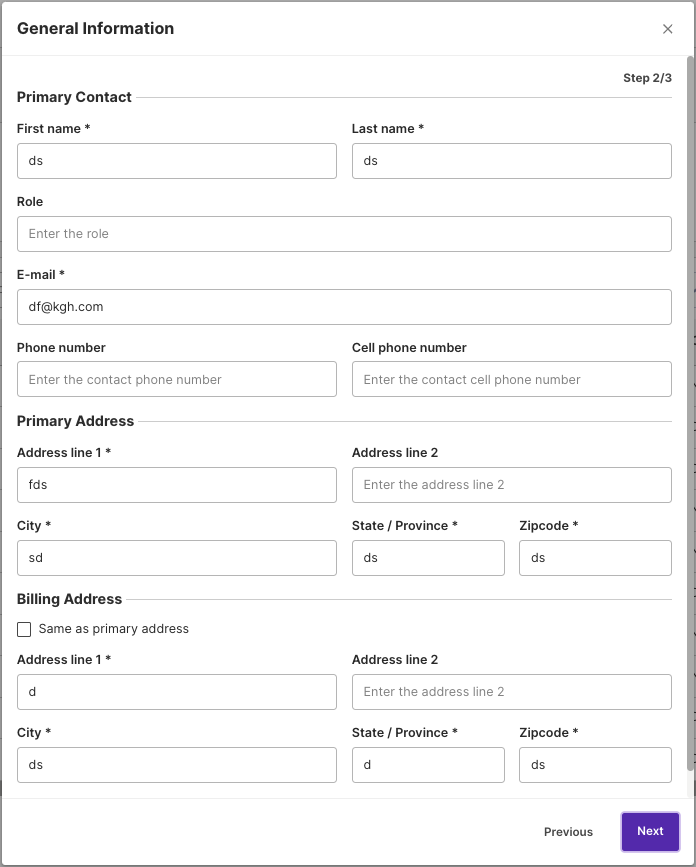
Clicking Next on the second step screen will take you to the final step screen.
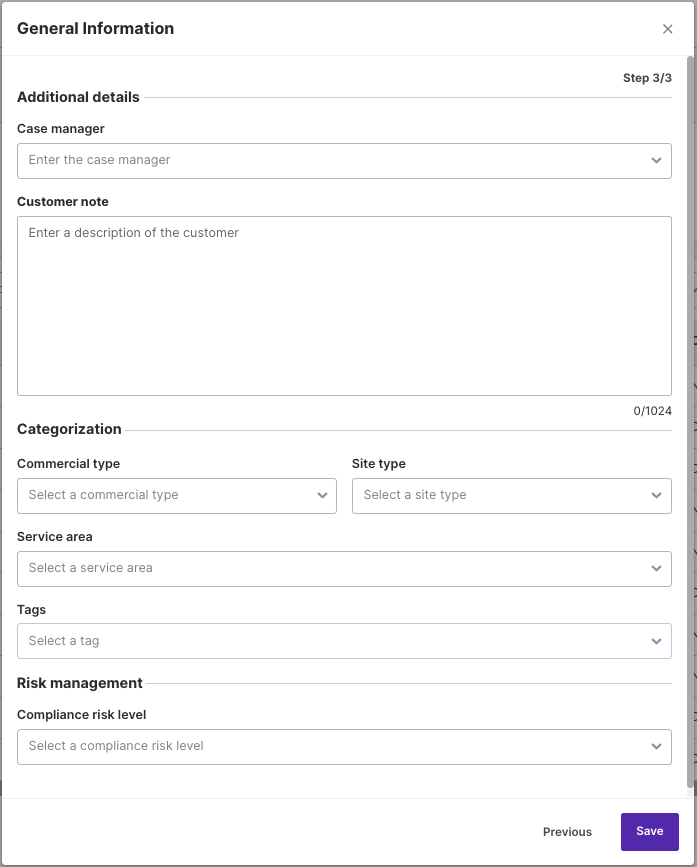
Step 3/3: Additional Details and Categorization
In this final step, provide essential details about the customer. Assign a Case Manager, add relevant notes and tags, select Commercial and Site types from the provided lists, specify the Service Area, and choose a Compliance Risk level for the customer. Each piece of information you provide contributes to a comprehensive understanding of the customer's needs and ensures efficient customer management.
Once you have completed the three steps mentioned above, click on the ‘Save’ button to create a new customer. The newly created customer is then displayed in the Customers list. The Customers screen displays the total number of active customers, the number of non-domestic customers, and the number of domestic customers in the top tiles. These numbers automatically update each time a new customer is created and placed into the appropriate tile.
Fantastic news! You've successfully unlocked the ability to create customers within the Community product. You’re on your way to efficient customer management.
To go to the next article in the Learning Path, Adding a facility to a non domestic customer please click here.