Overview
In this release, we are introducing real-time alerting for industrial pretreatment compliance sample limit exceedances. Industrial pretreatment compliance alerting feature enables utilities to monitor and automatically detect individual and calculated averages limit exceedances in industrial wastewater discharge, ensuring compliance with environmental regulations as per the permit limit.
Previously, our system evaluated only single sample result evaluations. Now, leveraging our reporting database calculation engine, we can calculate (daily, weekly, monthly) averages and trigger alerts exceeding the permit limits. When the system detects the limit, it will alert the user by auto-generating an issue in the issues register page. The auto-generated issue will provide the user with detailed information on the exceedance, and the samples that triggered the issue, where users will then be able to take immediate follow-up actions and assign to track. They will also be able to create/ link them to violations and log any enforcement actions or communications.
Importance of real-time alerting and issue tracking:
- Take immediate action: Real-time alerting allows teams to respond quickly, ensuring timely corrective measures to prevent further violations.
- Track compliance: The auto-generated issues will allow users to view a comprehensive record of all limit exceedances.
- Manage enforcement: Users will be able to link these issues to violations, document any actions required, and communications via the event log to resolution.
Compliance calculations are triggered when sample results are uploaded via SFTP or data transfer. The diagram below outlines the high level process:

The high level steps are as follows:
- Sample Integration background job writes a message to the compliance calculation trigger queue to initiate compliance calculations for sample results included in an SFTP upload or data transfer.
- Compliance calculation trigger messages are consumed by the Data Analytics platform.
- Live compliance calculation processing involves the following steps:
- Retrieval of latest samples and sample results from tenant database and loading into Reporting database.
- Execution of all compliance calculations for limits associated with sample results
- Writing of compliance calculation output to Reporting Database and identification of any non-compliances (limit exceedances).
- Messages including any non-compliances (limit exceedances) are written to the non-compliance writeback queue.
- Background job consumer process consumes messages and generates Issues and notifications for any non-compliances (limit exceedances).
Limit Setup
For compliance alerting to work limits need to be set up in the environment referencing the compliance calculations that need to be executed for individual parameters. Limits for the following calculations can be configured:
- Single Result Evaluation
- Daily Maximum
- Weekly Average
- Monthly Average
- Quarterly Average
- 6 Month Average
- Annual Average
Data Onboarding & Sync to Reporting Database
To perform the compliance evaluations, the system requires the following data inputs for each industrial user.
- Permit limit data: The allowed daily and monthly maximum limits for each pollutant as specified in the industrial users permit.
- Permit monitoring requirements: The minimum required samples to be collected to meet the specifications of the permit, this also includes details of the requirement such as the sample and analysis methods.
- Discharge sample data: This should include the date, location, and other information related to the sample.
- Discharge points: The asset needs to be added against customer facilities with monitoring locations(s) related to where the samples will be collected from.
- Discharge sample results (Concentration/mass): These should include the details of the sample results, parameter, value, unit and other details about the result.
- Discharge flow data: Include the volume of the discharge, this can be provided in different ways, most likely
- Daily Max (mgd)
- Daily Min (mgd)
- Daily Total (mgd)
- Monthly Total (mgm)
A prerequisite for compliance calculations to execute successfully is reference data such as Locations, Limits and Monitoring Requirements need to be synchronized to the Reporting database in the nightly sync process. This means that compliance alerting will only work the day after this reference data has been uploaded / configured in the tenant.
Setting up the environment
To enable auto-triggered issues for sample limit exceedances, follow these essential steps for setting up the environment. This setup is specific to data transfer uploads.
- Customer and facility setup
- Customer creation: Ensure that the customer is properly set up in the system.
- Facility creation: Add the relevant facilities against the customer profile.
- Discharge point setup: Each facility must have a discharge point (Asset) with defined Monitoring locations. This is critical for the system to track sample results effectively.
- Discharge permit creation
- Create discharge permit: Against the facility, you will need to create a discharge permit.
- Link to a discharge point (Asset): Ensure that the discharge permit is linked to the appropriate discharge point(s), which will enable the monitoring and limit sets for the discharge permit.
- Limit set creation
- Create a limit set: For each permit, establish the limit set that defines the allowed discharge for the relevant pollutants.
- Reporting requirements
- Create and set up your reporting requirement, this will give the user the view of how often they will need to submit their sample results, the user also has an option to directly save and import the samples via data transfer to be analyzed by the system.
- Monitoring requirement creation:
- Create the Monitoring requirement tied to that permit and link it to the limit set.
- Connect limit set to monitoring requirement: This is where users can define the location and frequency for sample monitoring, alongside additional information about the parameter.
- Monitoring plan creation:
- The monitoring plan will pull the duration based on the permit, users can select monitoring requirements for a given permit and choose the corresponding Limit Set.
- Organization unit: select the responsible organization unit ( Managed in Tenant Administration). Individuals within this organization will be notified of any parameters exceeding the limits when an issue is generated.
- Viewing monitoring results: All monitoring requirements for the parameters are displayed, and users can upload and view the results. If any of the results exceed the set's limits, they will be highlighted in red under the Results page of the monitoring plan. Clicking on the sample will open a side panel that shows the Issue ID, indicating that an issue has been generated for that sample result.

As for SFTP transfer, the user will need the similar setup but will be able to upload the sample results via SFTP Transfers under Data management.
Issues will be triggered given the user has the appropriate setup mentioned in Host and in Admin, once the user turns off the admin Autogenerate option, then issues will not be auto-generated and users will not be notified.
Auto-generated Limit Exceedance Issue
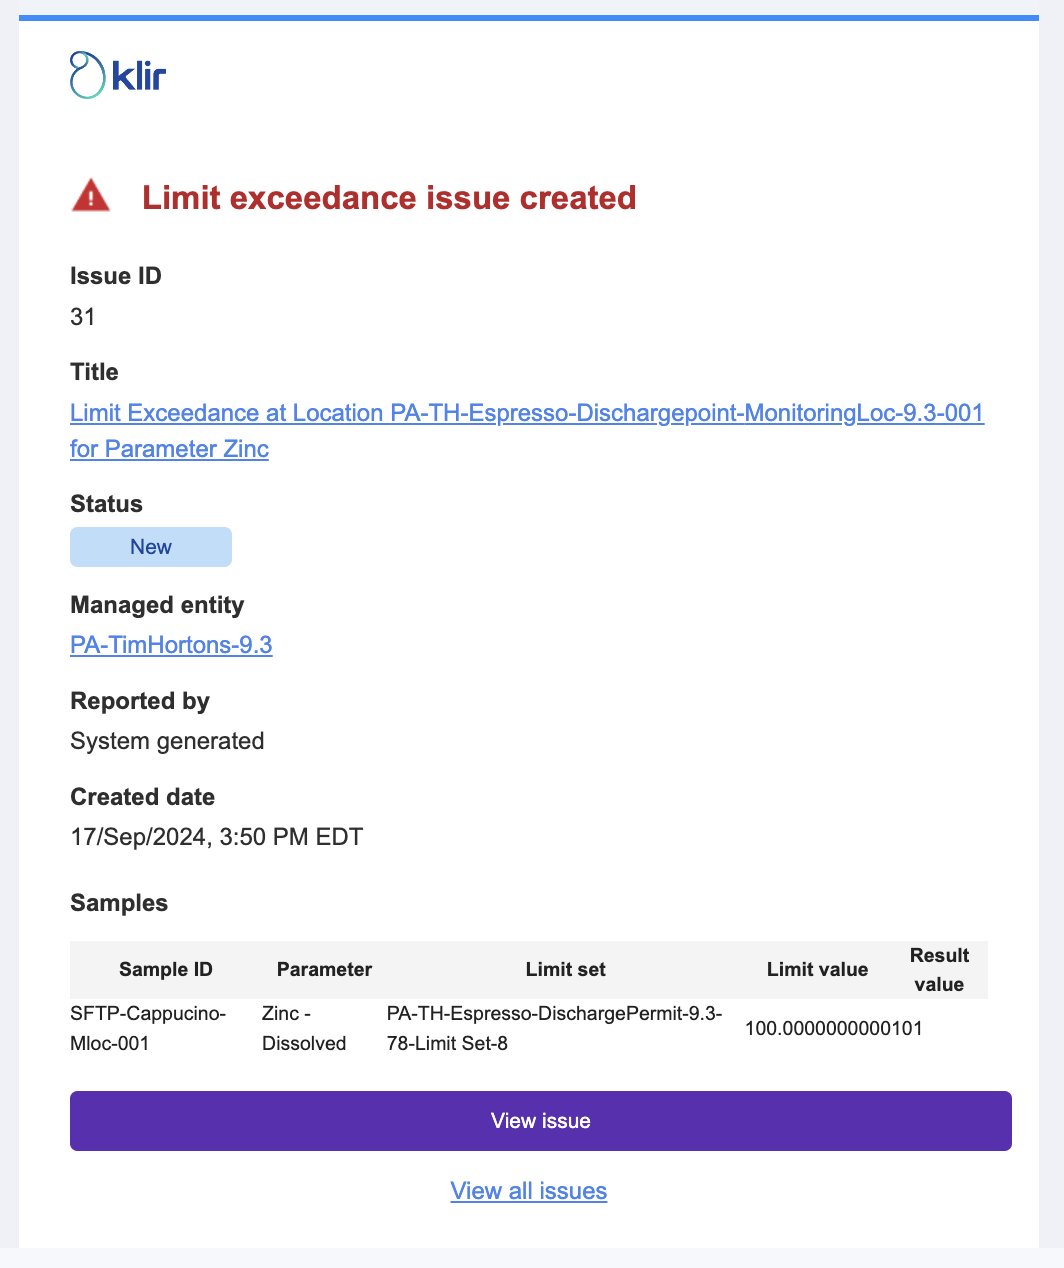
Once the issue has been auto generated given a limit exceedance has occurred based on the permit limit set up, the users added against the organization unit will be notified that a limit exceedance issue has been created in the Issues register page. The email contains high-level details and links to the issue
- The monitoring plan will pull the duration based on the permit, users can select monitoring requirements for a given permit and choose the corresponding Limit Set.
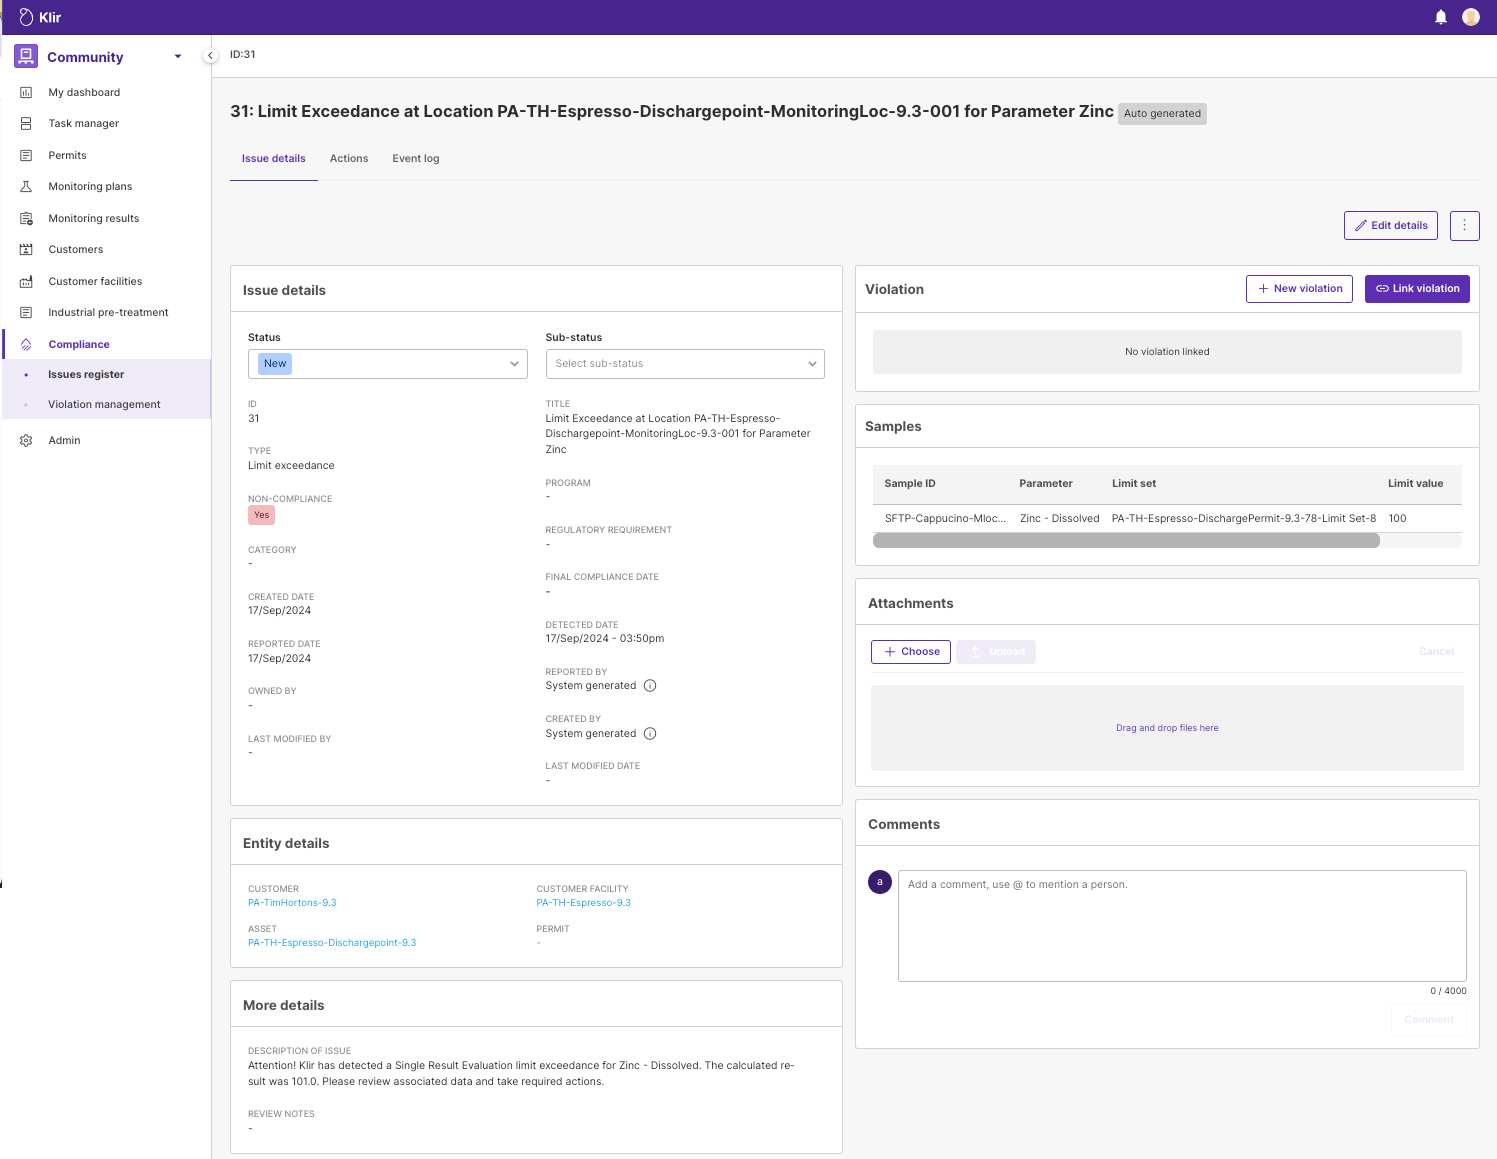
Viewing the Autogenerated Limit Exceedance Issue Profile
Once the user clicks to view the issue, they will be prompted to the Issue profile page. The key details in the issue profile for the auto generated issue type will be as shown below.
- Issue name: Issue name will follow the convention “ Limit exceedance at [Monitoring location] for parameter [Parameter name]
- Status: Defaulted to New
- Non-compliance toggle: This toggle will be active if the limit set type is defined as Regulatory
- Issue type: Limit exceedance
- Program: Defaults to Industrial pre-treatment
- Detected date: The date the system detected the limit breach
- Future enhancement: We will capture the collected date of the sample or most recent sample for multiple samples that led to the breach in calculation.
- Reported by: Default to System generated
- Managed entity details: Based on the monitoring plan, the system will map and generate the Managed entity path showing the Asset (discharge point) for the customer/ customer facility
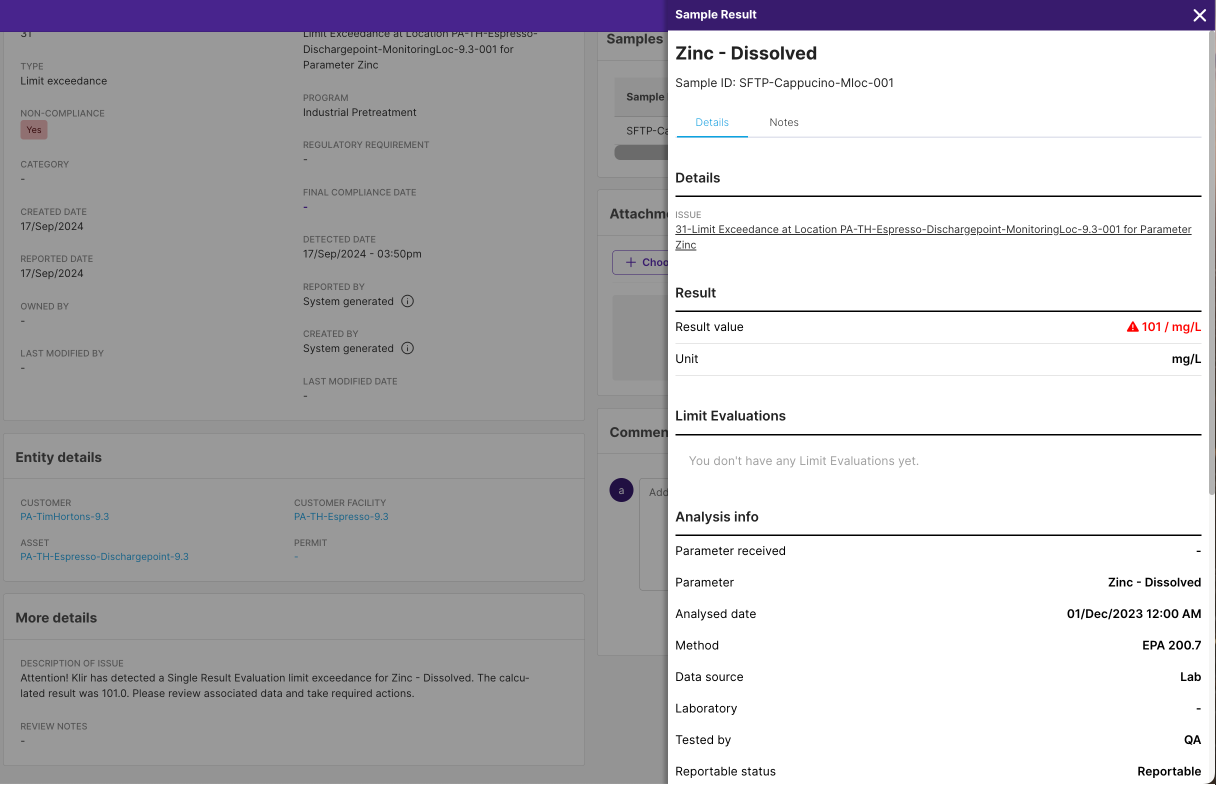
- Sample card: This will display the sample results that caused the limit exceedance issue, the user will be able to view the detailed information on the sample side panel.
- Issue description: The description will auto-fill with the given message “Attention! Klir has detected a [Calculation] limit exceedance for [Parameter]. The calculated result was [CalculationResult]. Please review the associated data and take required actions.”