Creating a new user in Klir is a simple and straightforward process.
To get started, navigate to the Klir Administration area, which can be found on the drop-down menu on the left side of your screen.
Please note that only users with the Organization Administrator type can create or edit users.
Before you start, think through what types of actions and information you may want the new User to have to ensure Klir remains the single source of truth.
Once you're in the Administration area, you'll be able to easily add new users and manage their access to various features within Klir.

Click on the "Users" tab in the left-hand navigation menu. This will take you to the User creation and edit screen, where you will see a list of current users that have already been created.
To create a new User, click on the “+ New User” button on the right-hand side of the screen.
From here, you can click on the "New User" button in the top-right corner of the screen.
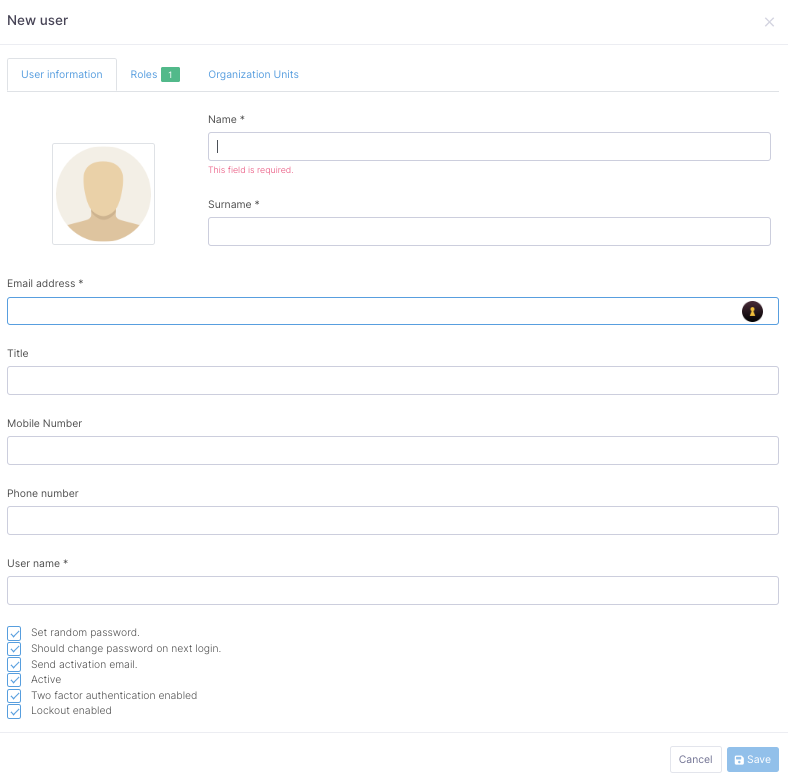
This will open up a form where on the first tab you can enter the new user's information, such as their name, and email address.
Once you have entered all of the required information, simply click on the "Save" button at the bottom of the form to save the new user.
The new User form includes some mandatory fields marked with a red asterisk (*) that must be filled out in order to save the new User.
(please see the glossary section at the end of this document for additional information)
The same screen appears when you choose to edit the details of existing users. You can access this screen by clicking on the three-dot menu icon under "Actions" to the right of any user record in the user list.
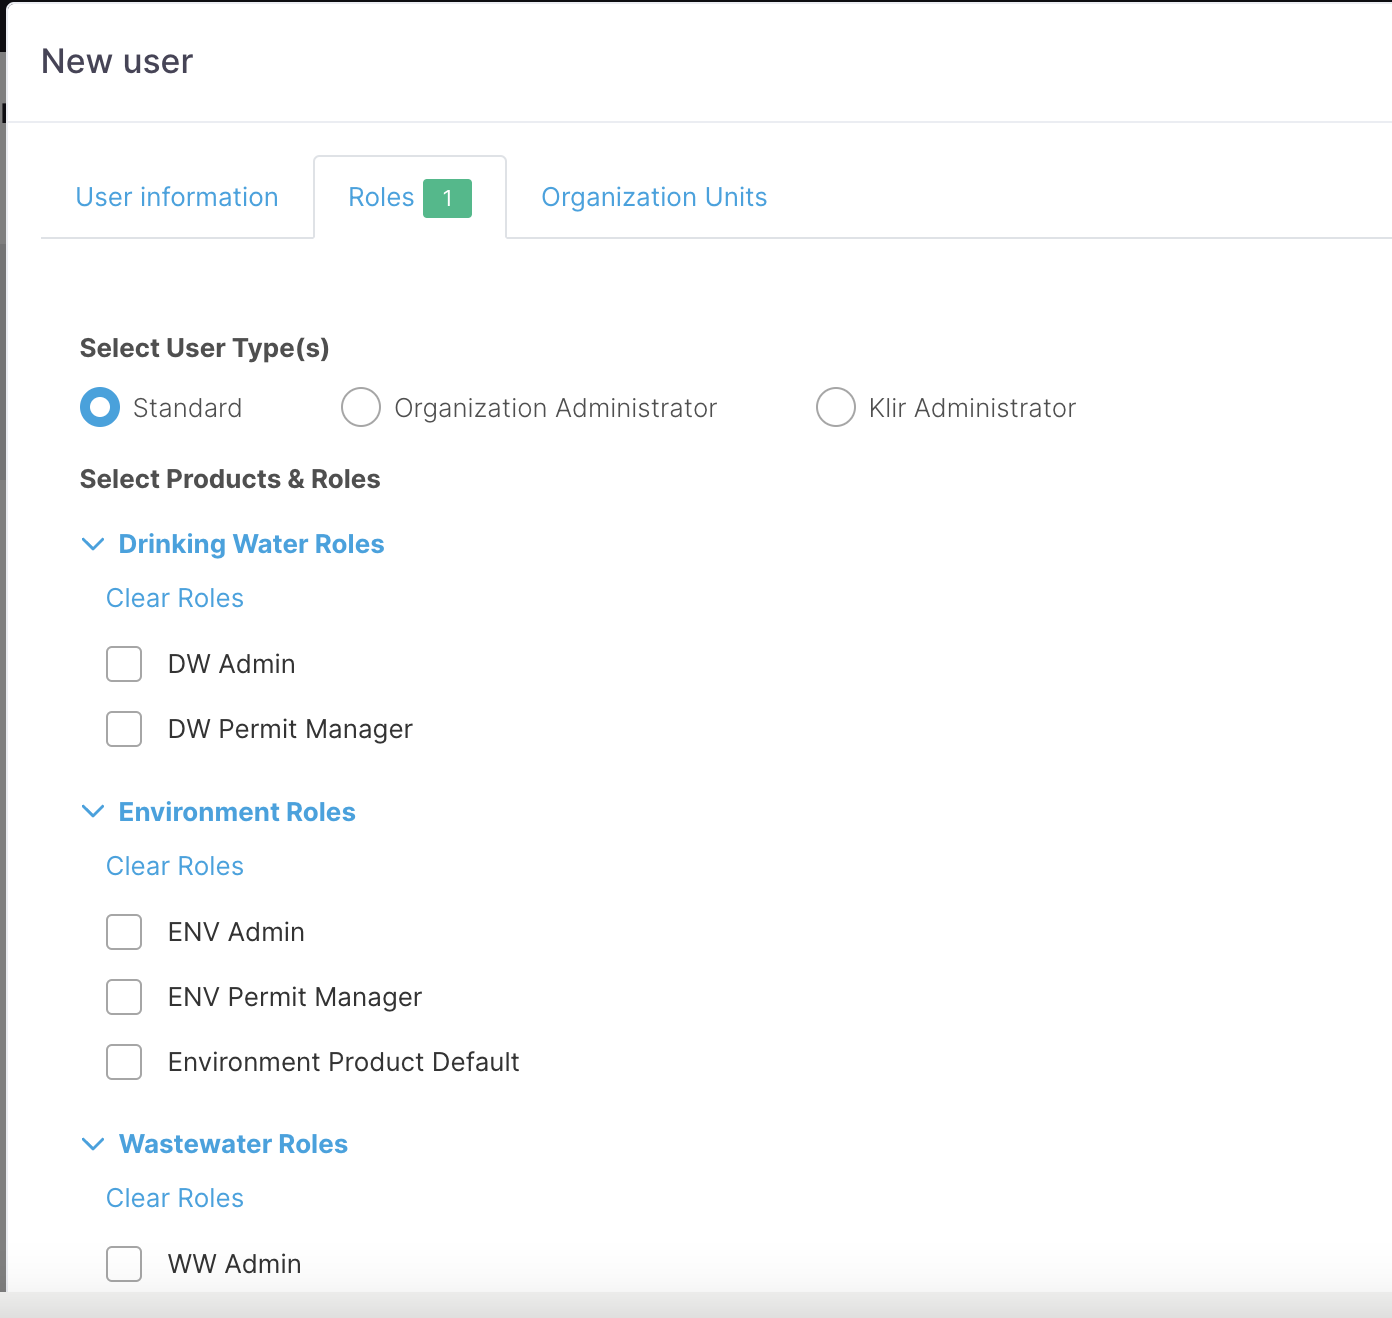
You can apply user types and/or roles by clicking on the second tab. You'll see a list of available product roles that provide various permissions and access to different areas in the Klir system depending on the roles selected.
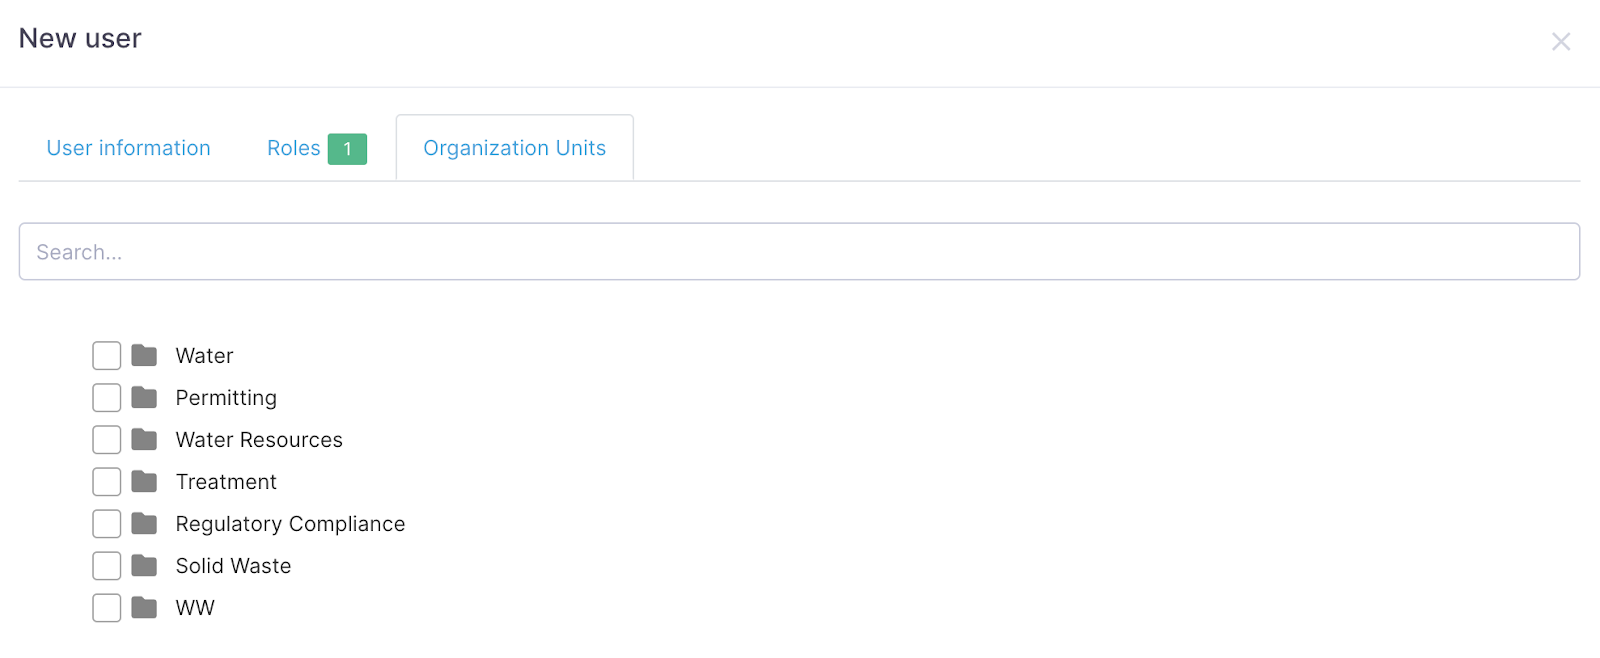
The third tab contains Organization Units or groups you can place a User into if you wish to do so.
This can be helpful for organizing and managing your users, especially if you have a large number of users.
Congratulations! You have successfully learned how to create a new user in Klir.
With this newfound knowledge, you can now effortlessly manage user accounts and access within your organization.
Remember, if you ever need further assistance or have any questions, our dedicated support team is always ready to help.
Happy user management!
Glossary
User Fields
Name: First name of User
Surname: Last name of User
Email address: Email Address of User
Title: Work Title of User if they have one
Mobile Number: Mobile Contact information area
Phone Number: Contact information area for new User
User Name: Use name to be used by the new User. If using SSO (Single Sign On) User names are required to be and match the User’s email address.
Set random password: Creates a random password for the new User
Should change password on next login: Check if you would like the User to change their password on their next logon into the Klir system
Send activation email: Select if you wish to send an activation email notification to a new User
Active: Sets the User profile to an active state so that they can access the Klir system
Two factor authentication enabled: Enables the requirement of two separate, distinct forms of identification in order to access the system.
Lockout enabled: Select if you wish to lock out access to the Klir system for the User.
User Types
Standard: Standard User type to use the Klir system.
Organization Administrator: Provides access to the Utility Administration area to create or edit Users and Organization Units.
Klir Administrator: Provides access to the Klir Administration area to create or edit Users, Organization Units, and Roles.
Roles
Each Product (Drinking Water, Waste Water, and Environment) can have an Administrator, Permit Manager, and Read Only User Role created as “Out of the Box” roles.
Additional Roles can be created if needed outside of the “Out of Box” roles. We would be happy to work with you to tailor roles specific to an individual or group's needs.
Multiple roles can be applied to a User if they may be part of a shared services department or need to access more than one product.
For example, a User can be an Admin in the DW product, and a Permit Manager in the WW product allowing access to both products and work within each according to the privileges granted by the role they have.
DW/WW/ENV Admins: Permission set that provides access to Administration areas in the specific product at the bottom of the left hand menu.
The Admin areas of a product contains items such as Permitting Management (configure Permit Types, Permit Organizations, and Units), Tags Management, and Data Management (for importing files) to name a few.
DW/WW/ENV Permit Manager: Permission set for managing permits and tasks. Allows access into the specific product and ability to create and edit permits and tasks.
DW/WW/ENV Read Only: Read only role that allows access to a specific product but is unable to create or modify information (permits or tasks) in the system.