Purpose
To provide instructions for the technical administrator to configure the SCIM integration to Klir’s system using the Microsoft Entra of the organization (former Azure Active Directory), so the users can be provisioned automatically on the Klir system.
Requirements
Having the Azure Active Directory configured for the organization. Klir should provide the SCIM URL and the Token to authenticate the application.
Step 1: Create the Enterprise Application
- Sign in to the Azure Portal.
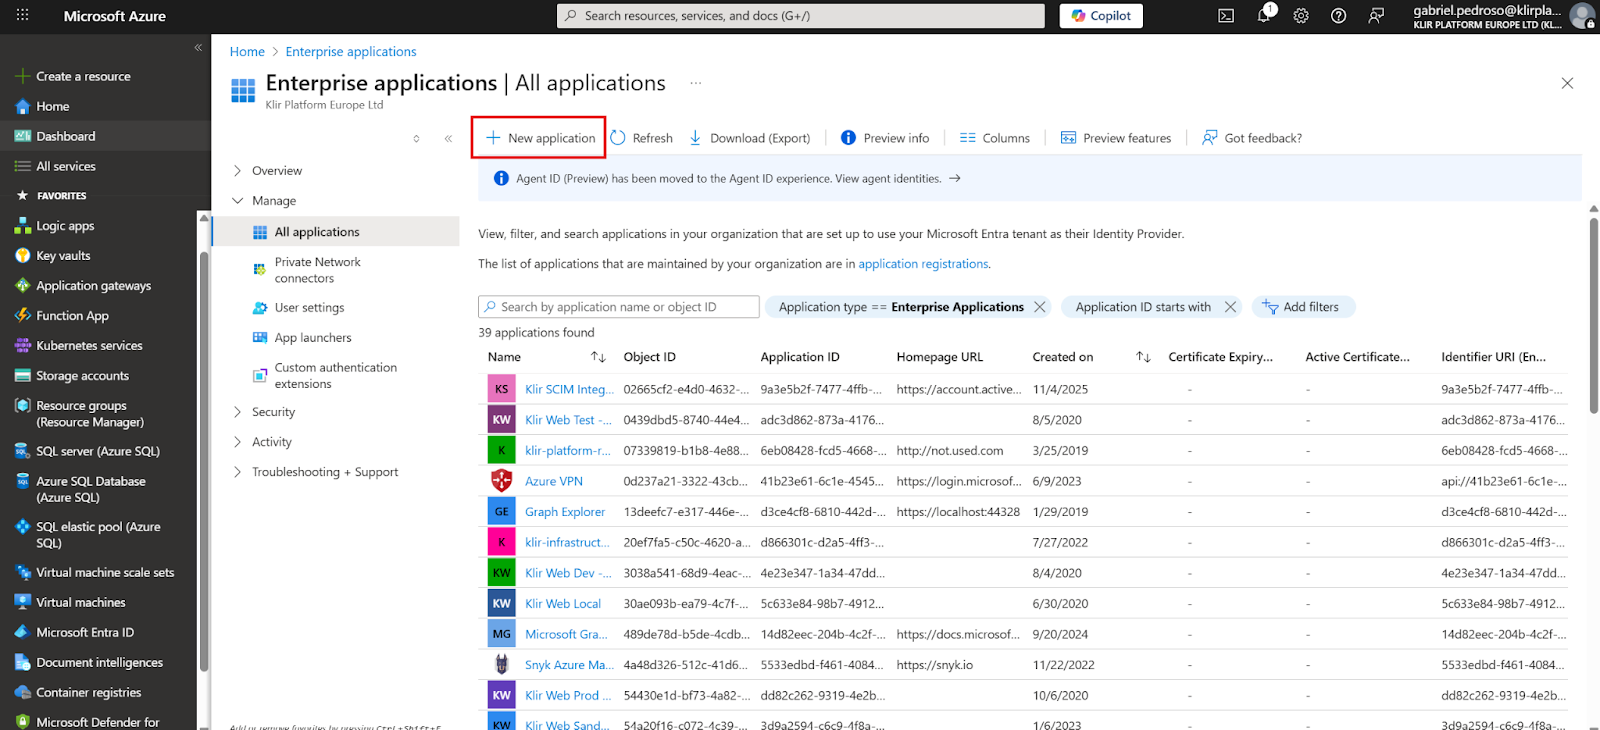
- Navigate to Enterprise applications
- Click + New application
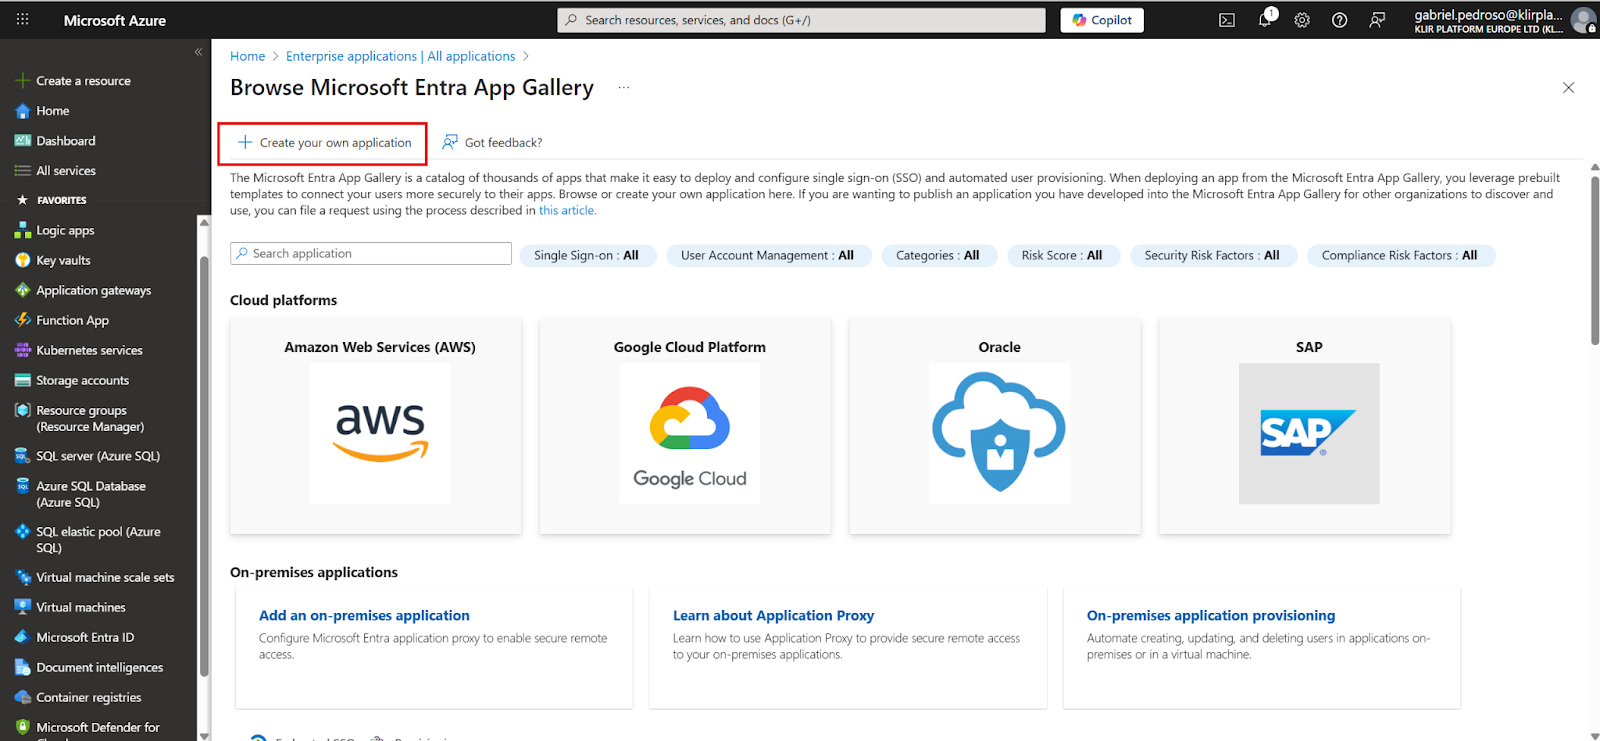
- Click on + Create your own application
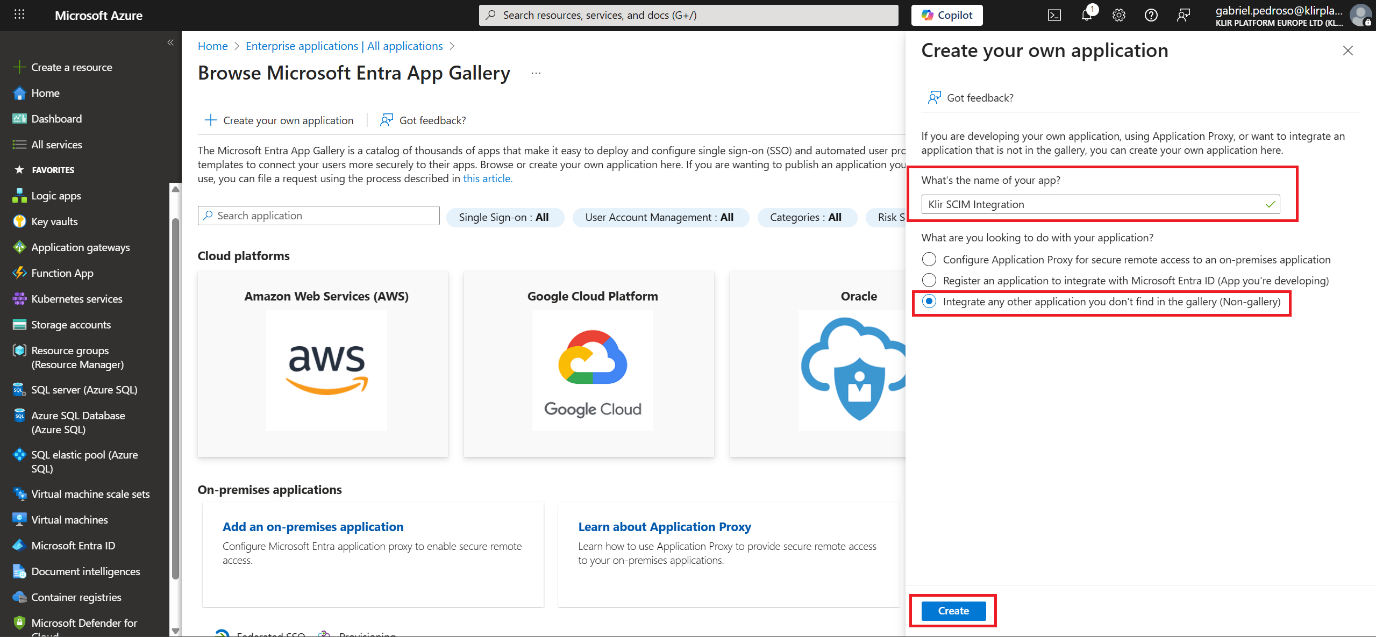
- Name it (e.g., Klir SCIM Integration) and select “Integrate any other application you don’t find in the gallery (Non-gallery)”
- Click Create
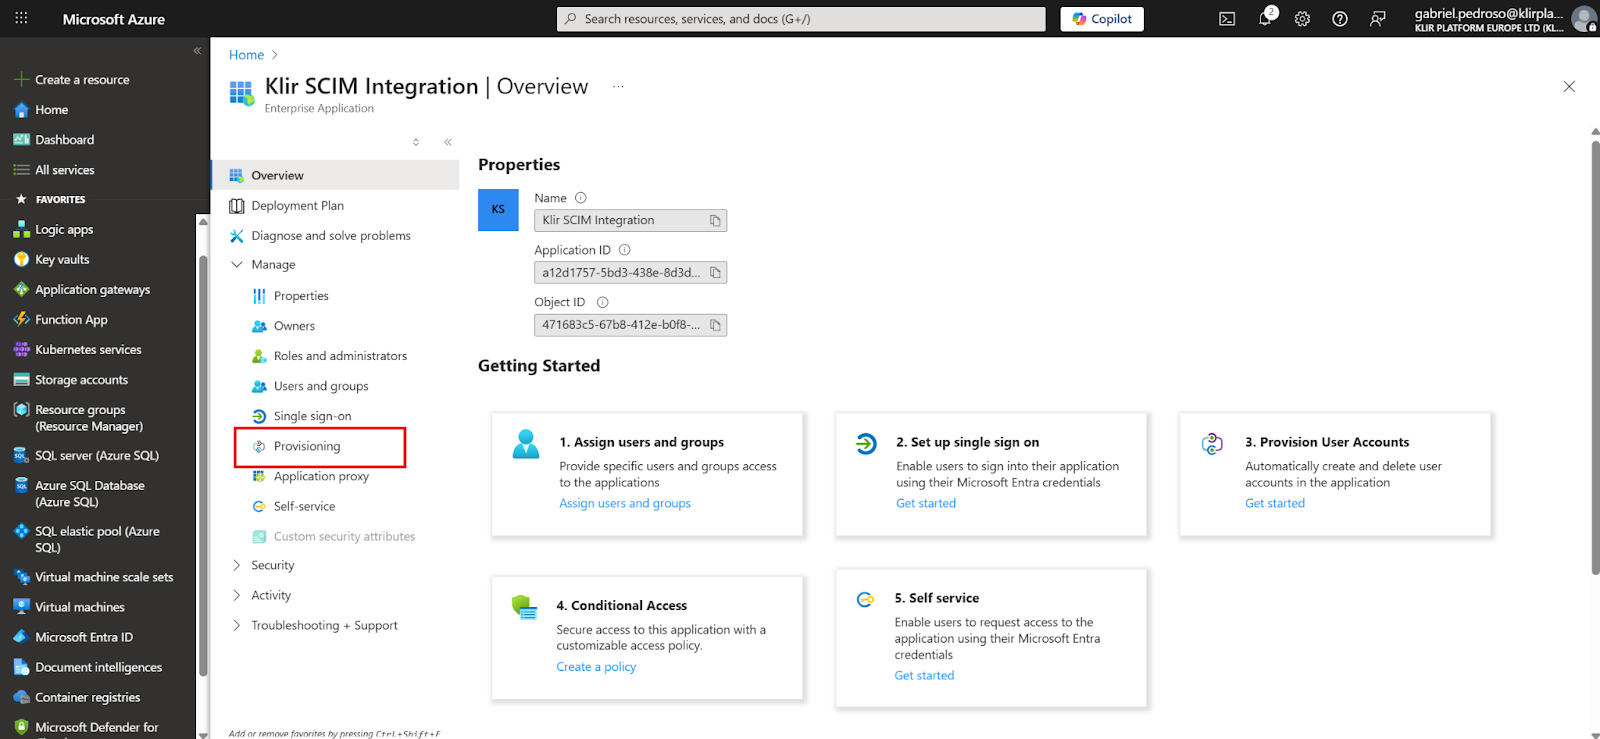
Step 2: Enable Provisioning (SCIM)
- On the Enterprise Application, go to: Provisioning
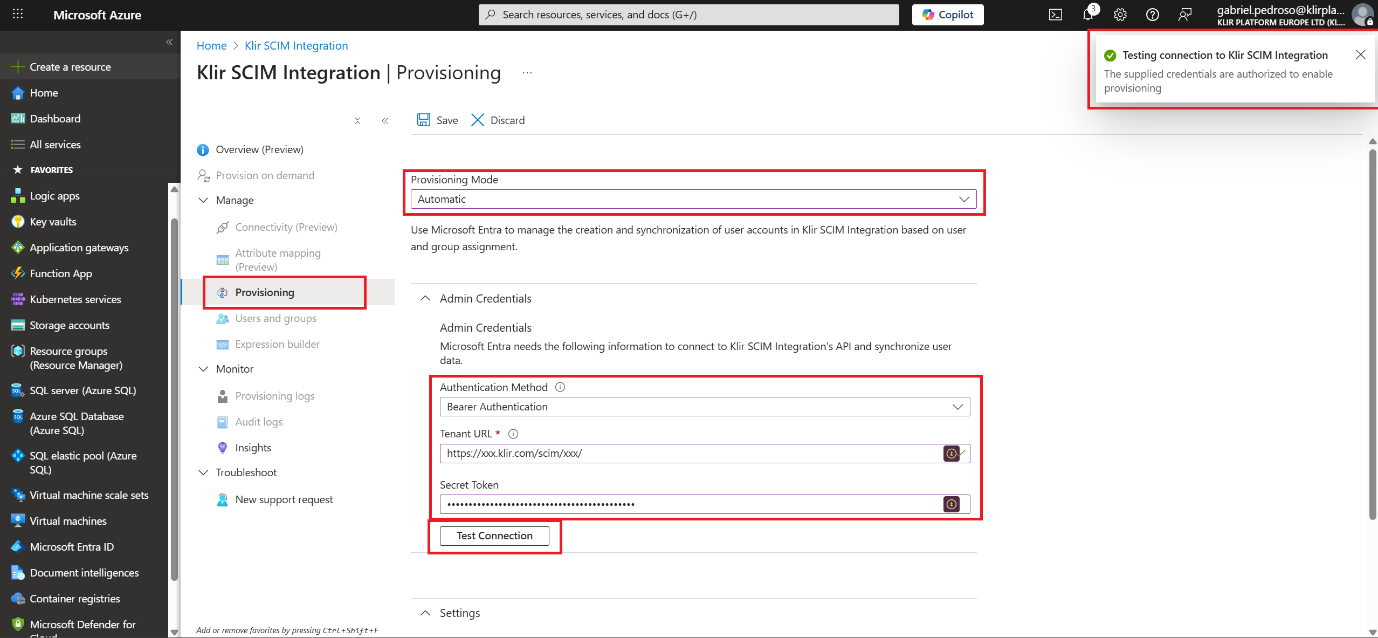
- Under Provisioning Mode, choose:
- Automatic
- Enter your SCIM endpoint URL and Secret Token:
- Tenant URL: https://xxx.klir.com/scim/xxx/
- Secret Token: your API key or bearer token.
Azure AD will send Authorization: Bearer <token> in each SCIM call.
- Click Test Connection.
- You should see a success message if your SCIM API responds correctly.
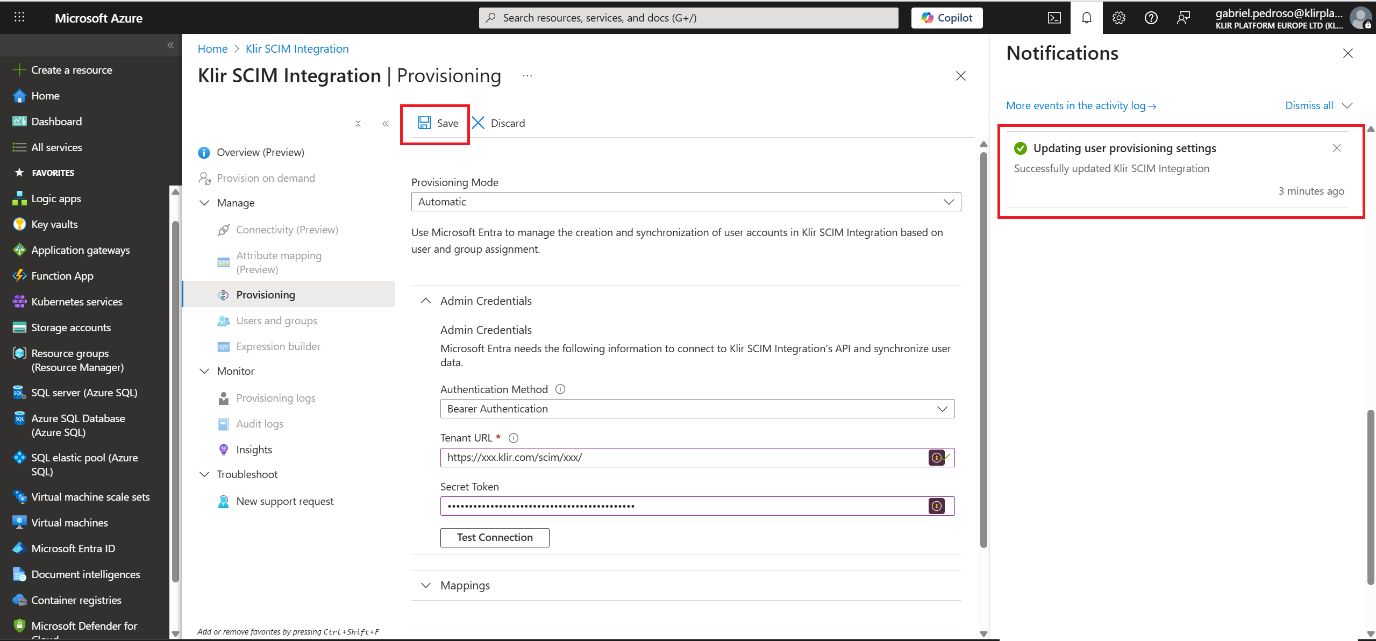
- Click on Save.
- You should see a success message.
Step 3: Configure Mappings and Enable Provisioning
Azure automatically detects SCIM schema attributes, but you can customize them:
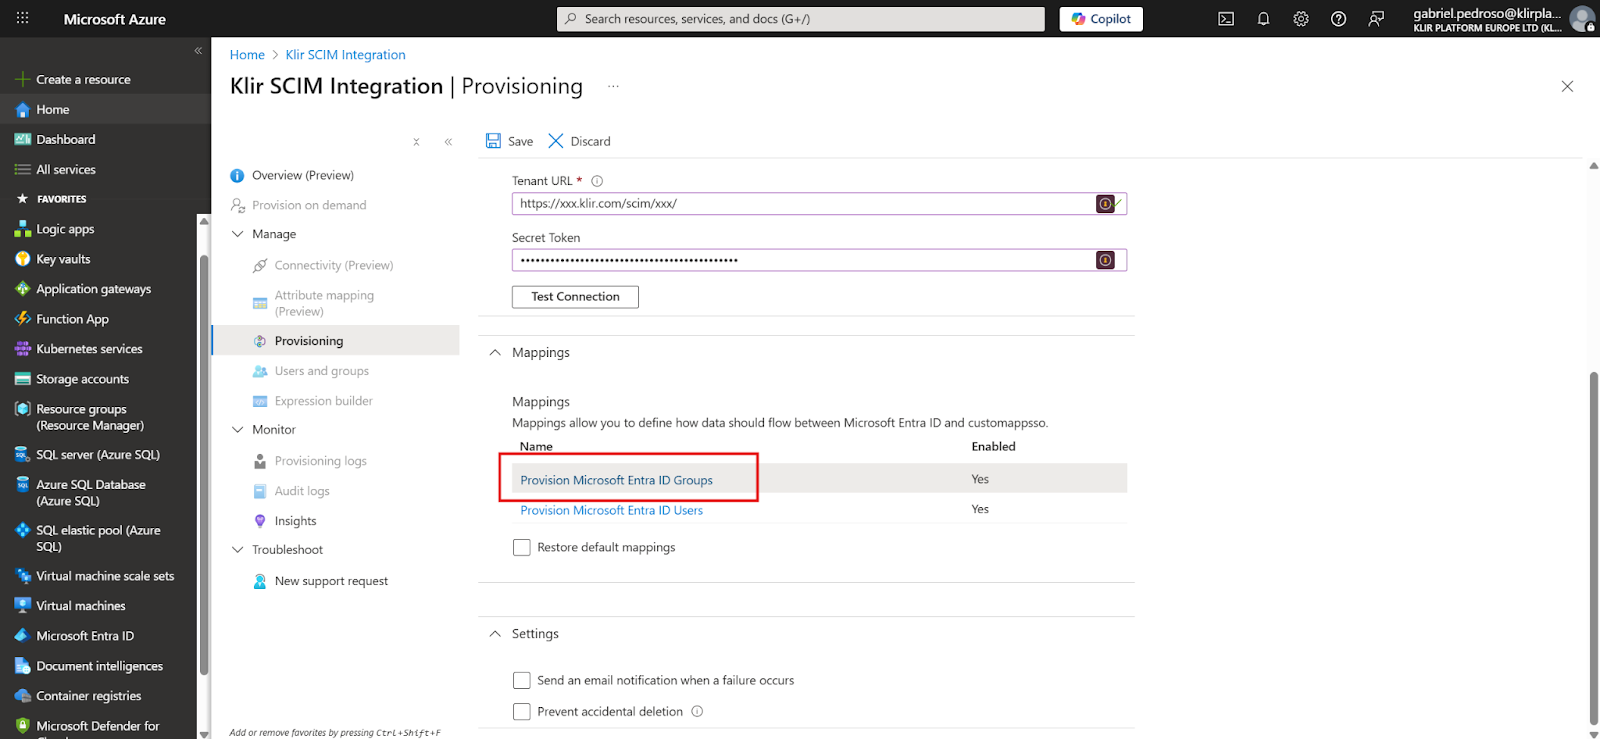
- Still under Provisioning, expand Mappings.
- You’ll see two mappings:
o Provision Microsoft Entra ID Groups
o Provision Microsoft Entra ID Users
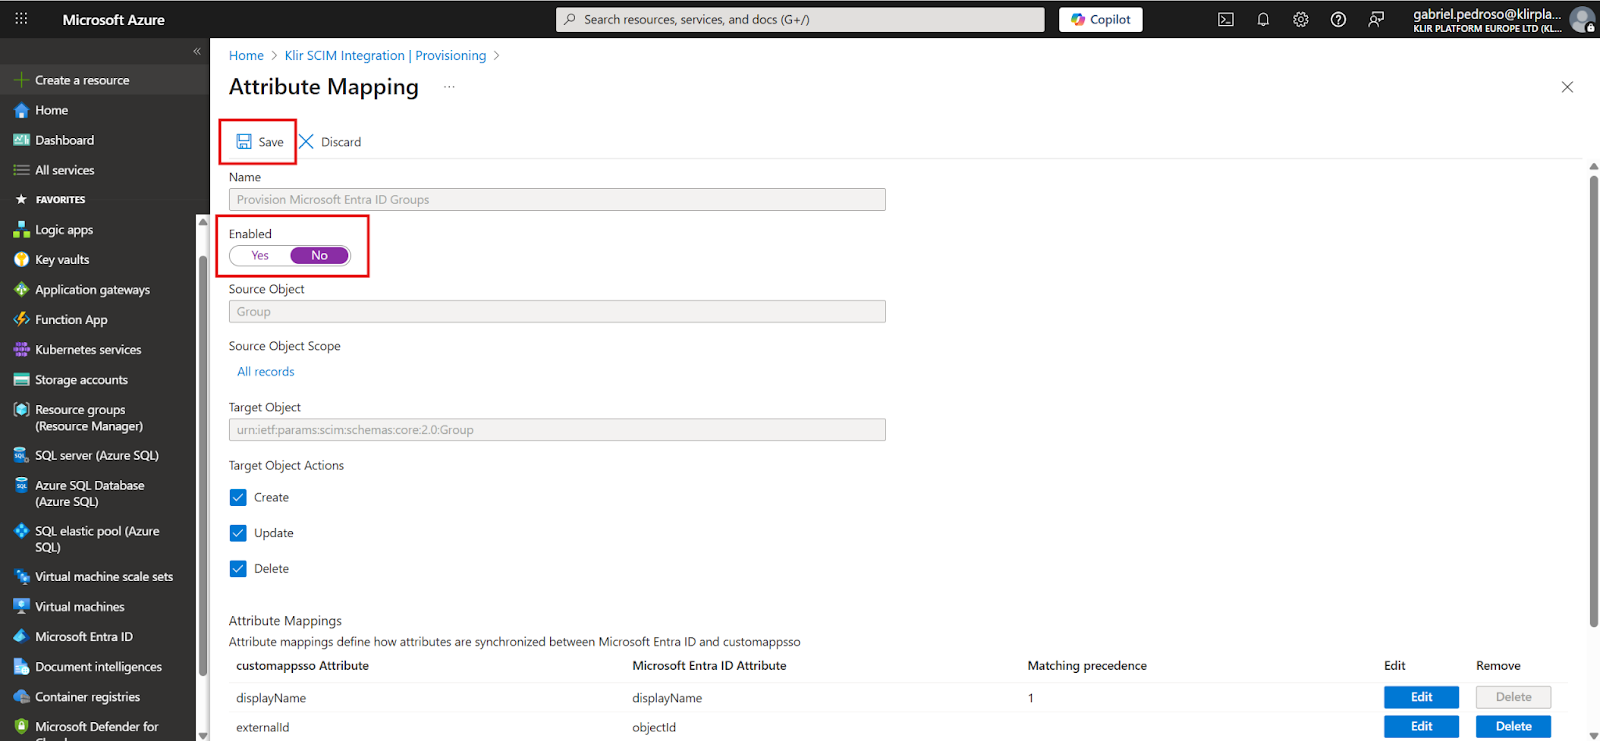
- As Klir currently doesn’t support Groups integration, we’ll need to disable it
- Click on Provision Microsoft Entra ID Groups
- Click on Enabled > No
- Click on Save
- Click Provisioning Status > On
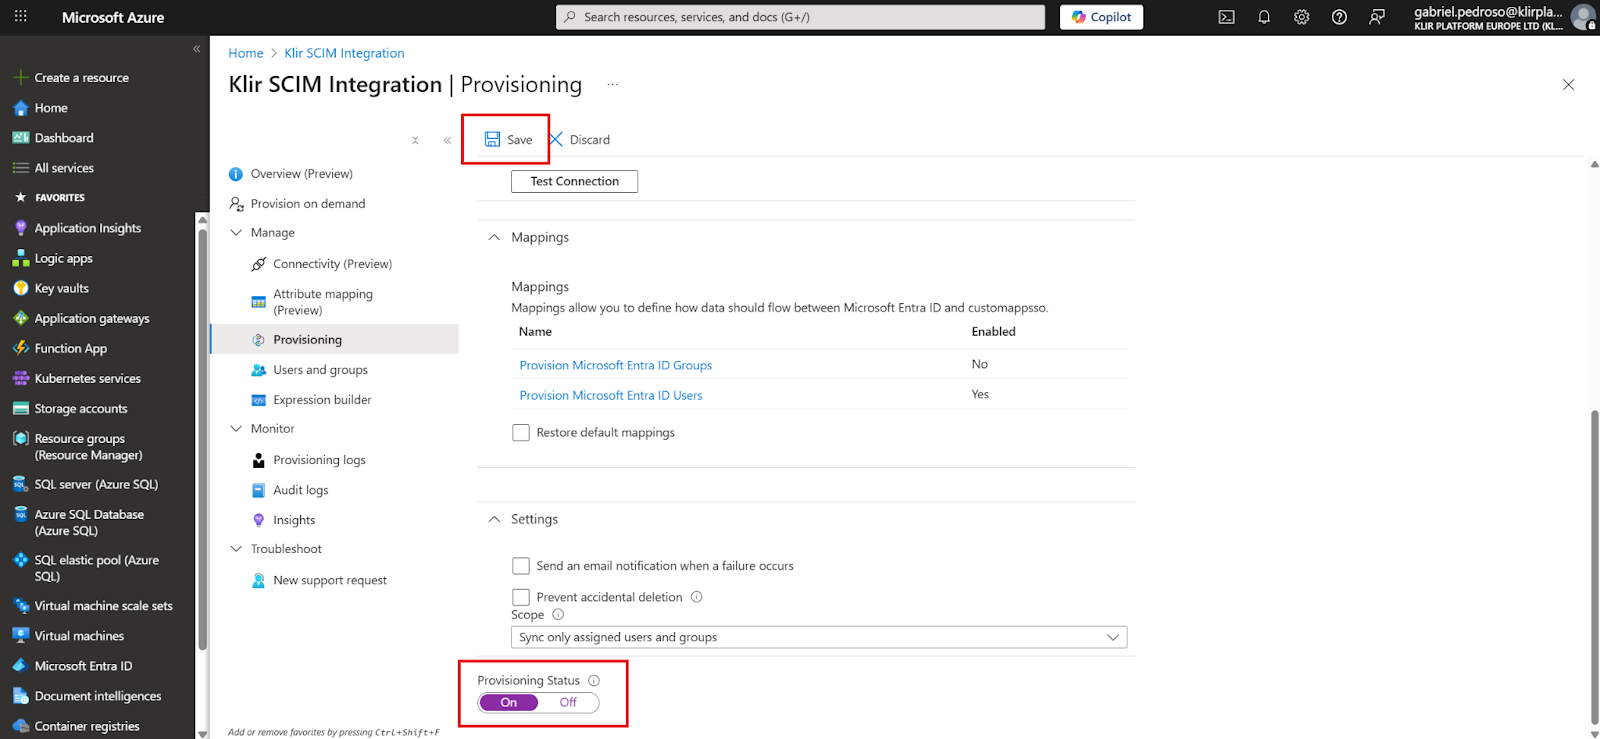
- Check the final details

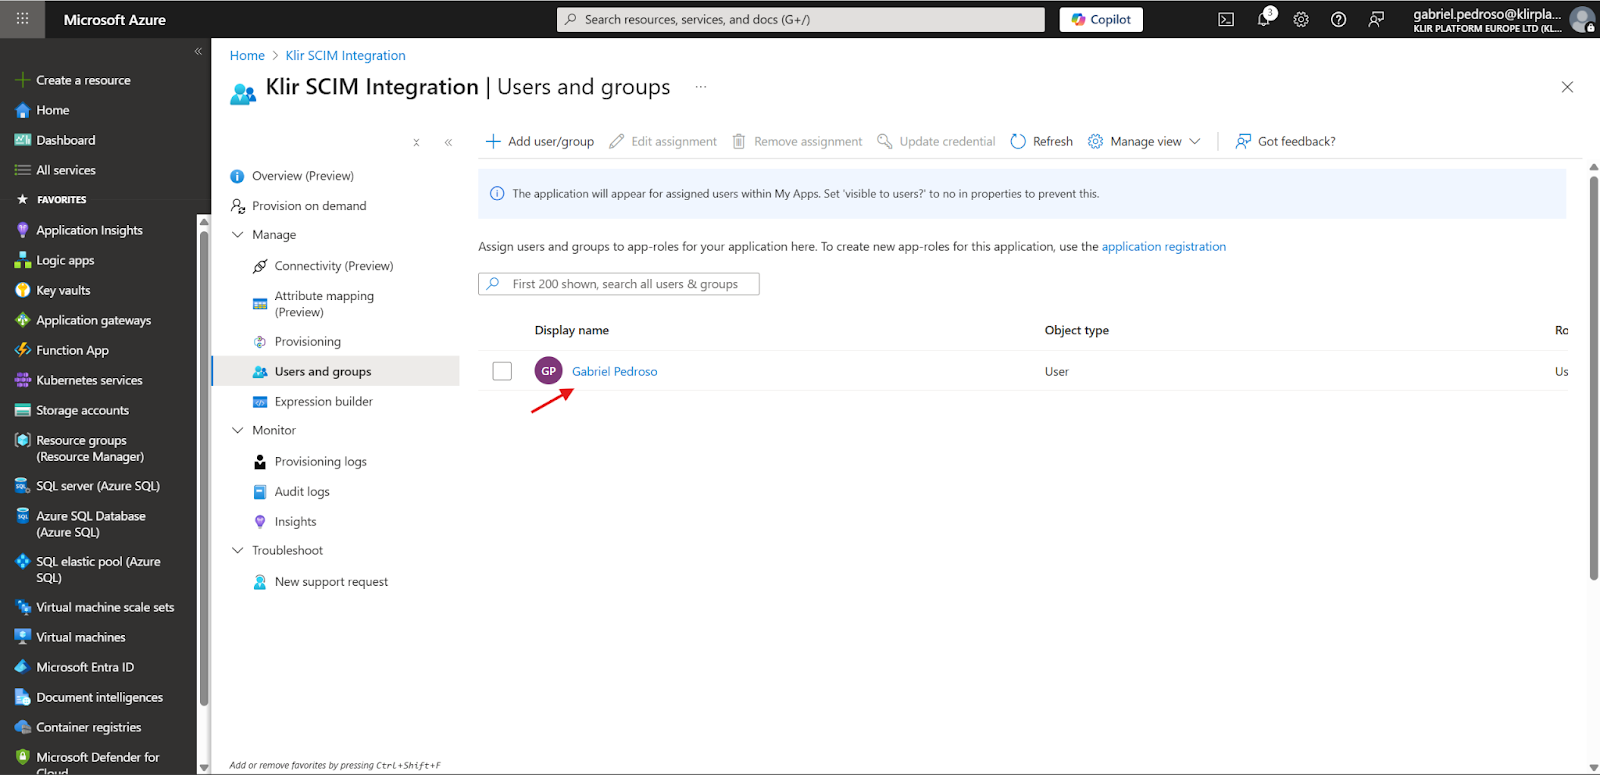
Step 4: Configure Users for Provisioning
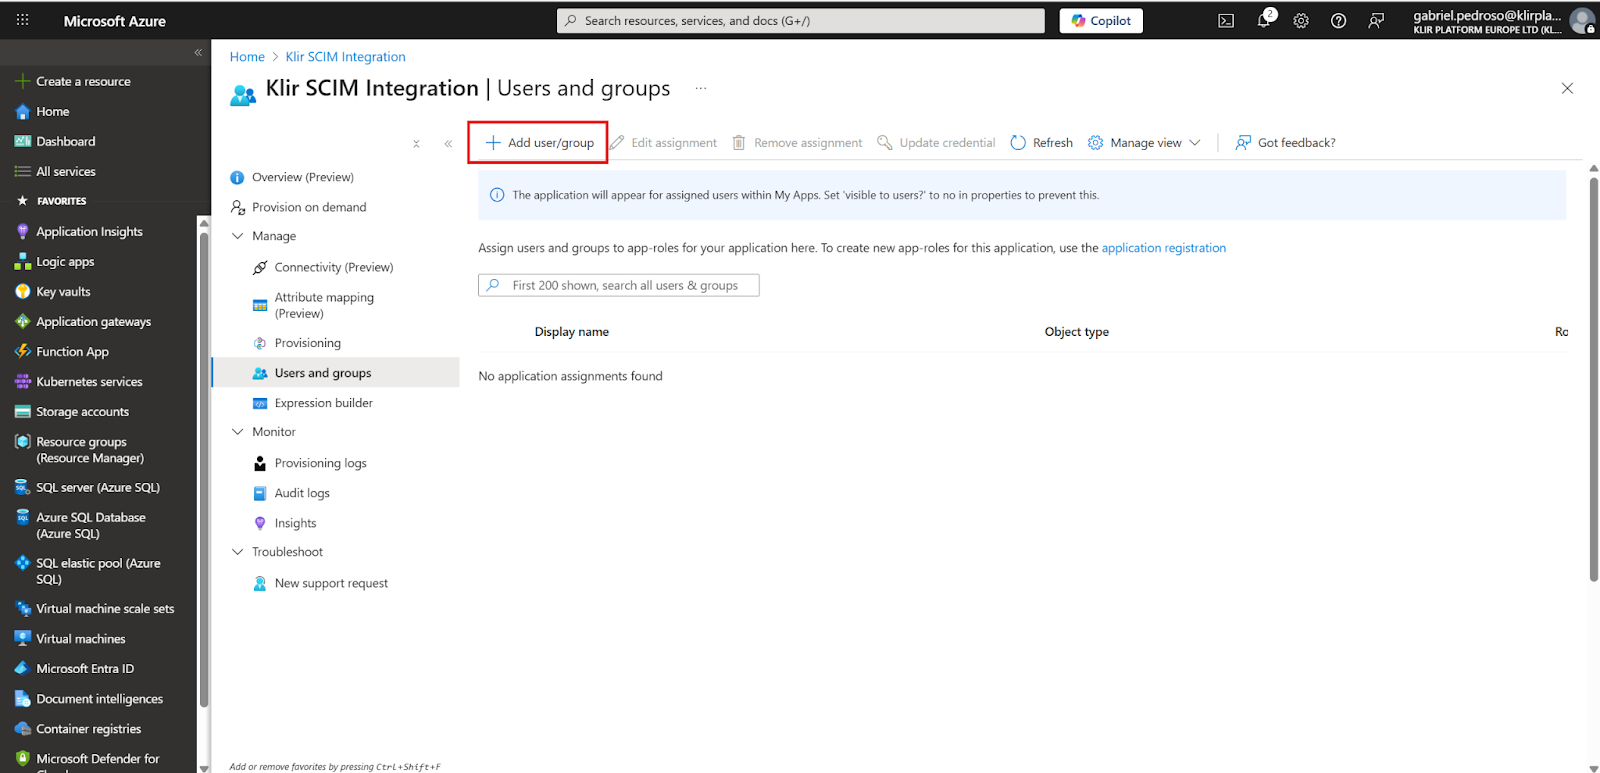
- On the Enterprise Application, go to the Users and groups page
- Click on + Add user/group
- Click on Users > None Selected
- Search for the users you want to provision
- Click on Select

- Confirm the users that should be added, and click on Assign
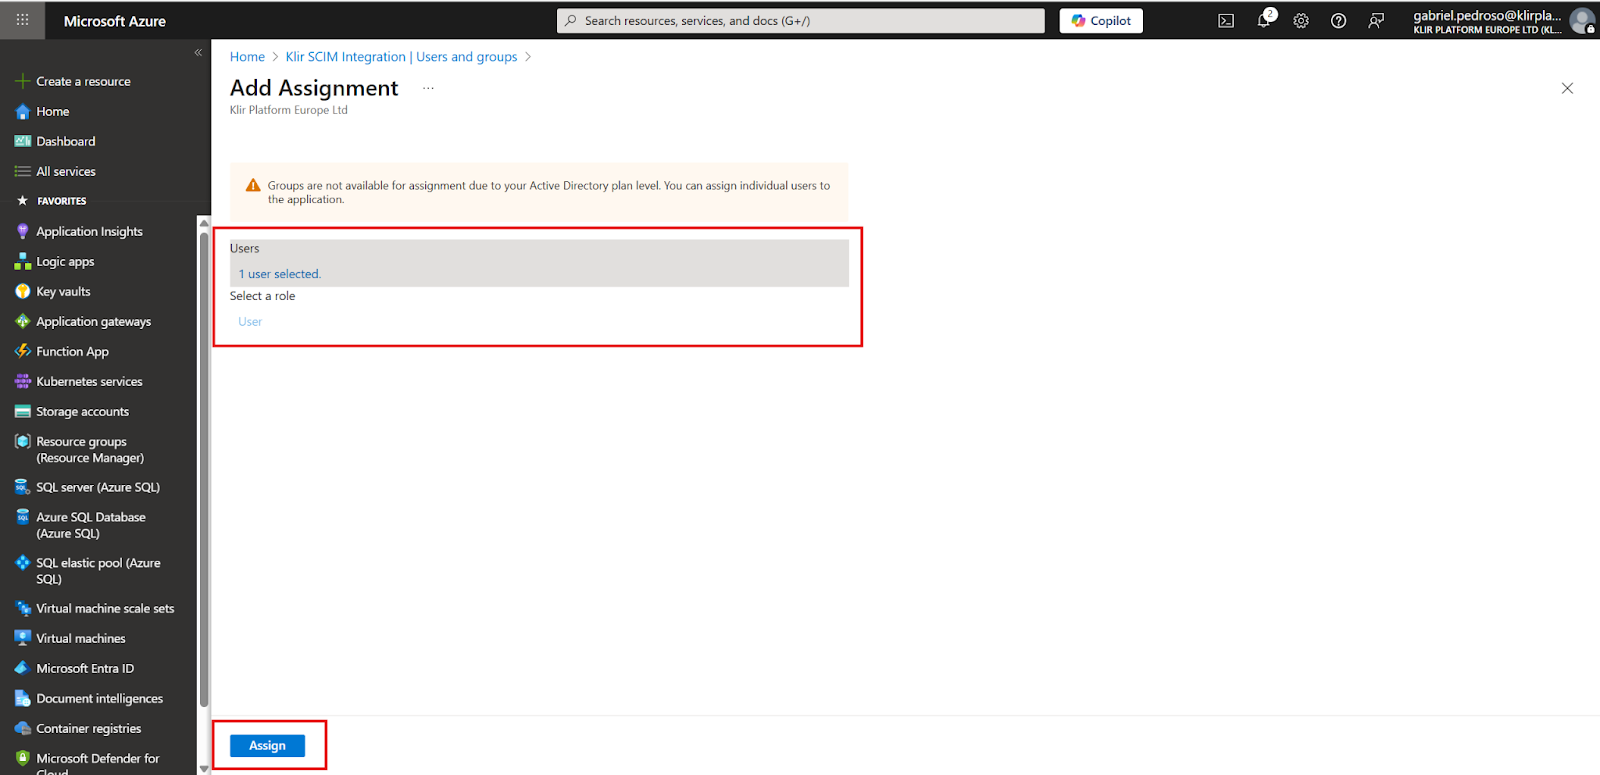
- You should see the complete list of users that will be provisioned
Azure will automatically start syncing users to your SCIM endpoint every ~40 minutes (you can force a sync manually with Provision on demand).
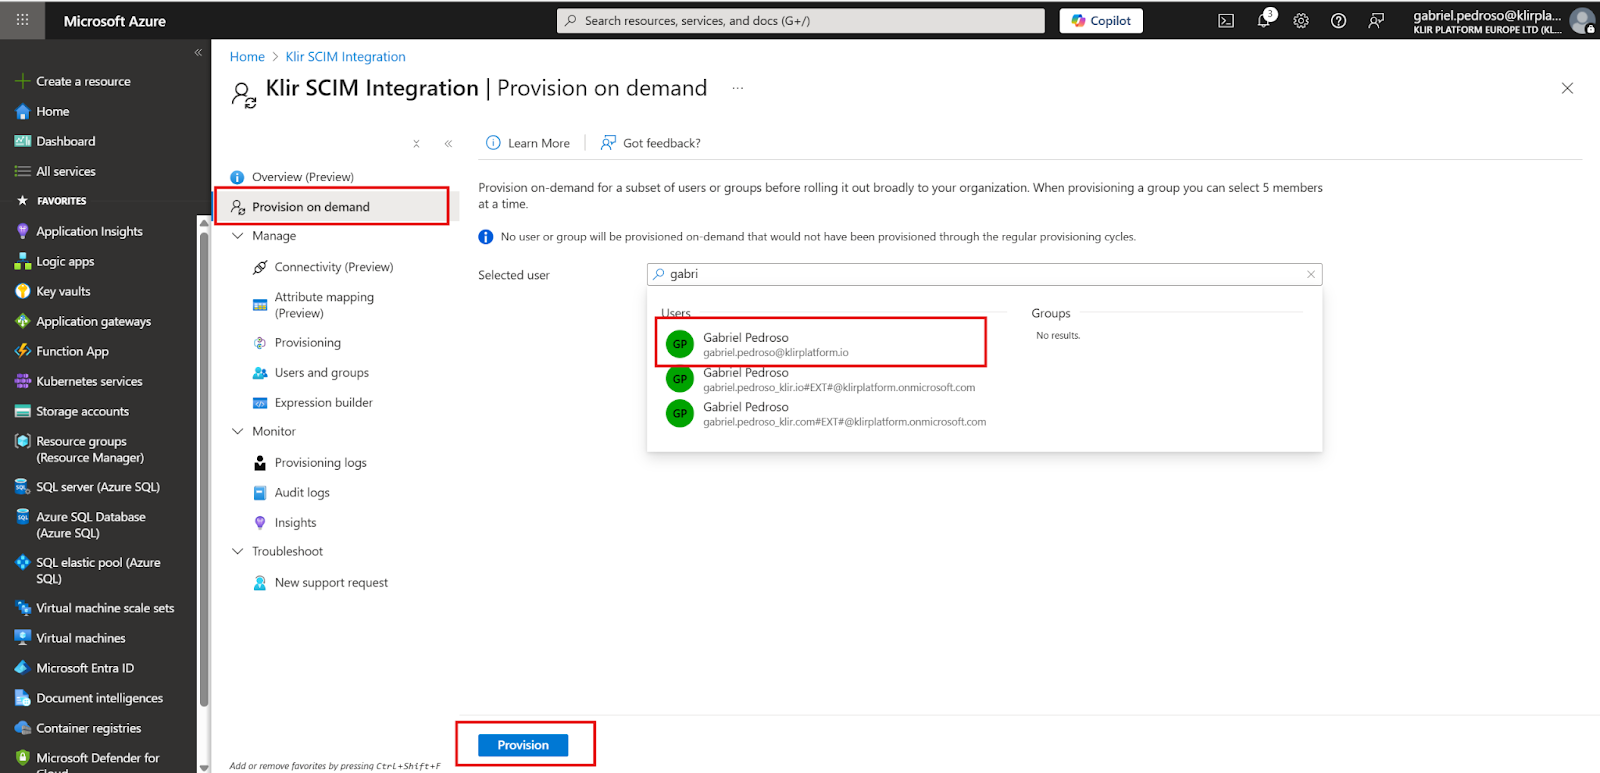
Provision on Demand
- On the Enterprise Application, go to Provision on demand
- Find a user you want to synchronize
- Click on Provision
- You should see the successful result message of the Provision request

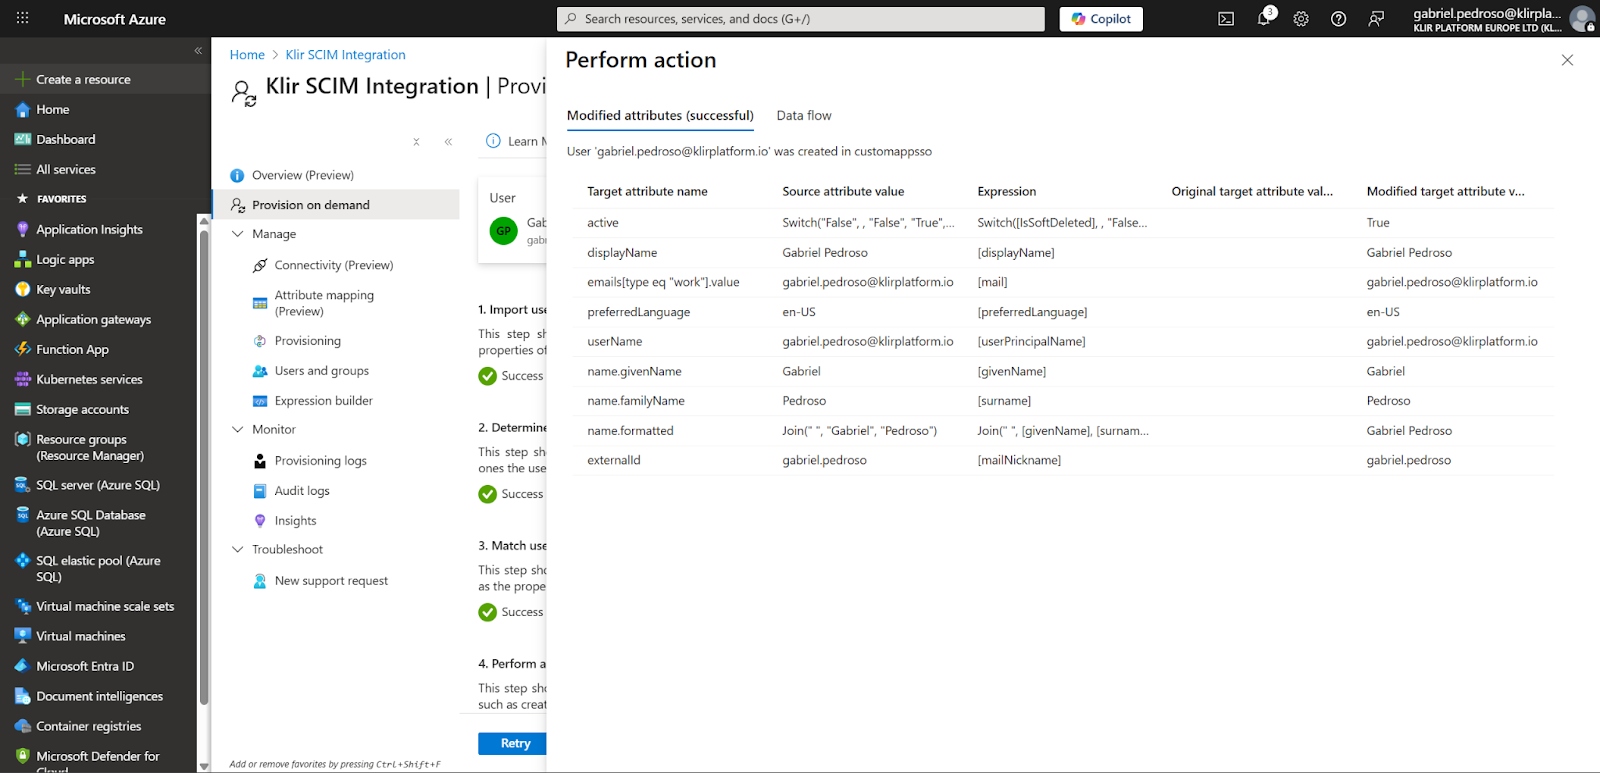
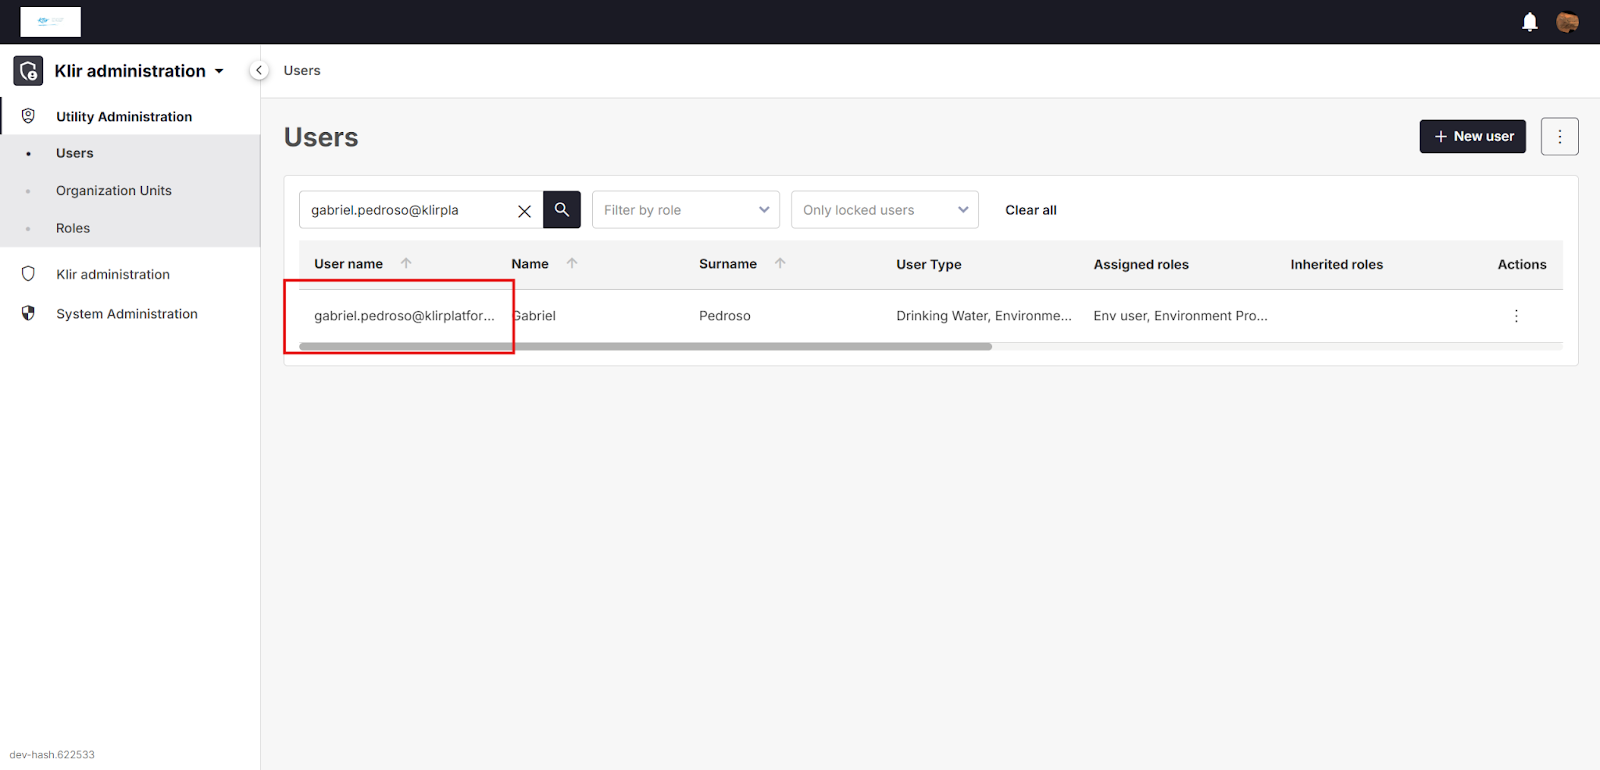
- Check if the user was created on the Klir System